
Terry Mack Media Room Update
Hi everyone. My name is Scott, and this page is to show my progress on the creation of a media room in my basement. This room is dedicated to a very good and lifelong friend of mine who was the inspiration for this build. I’d also like to give a big thank you to my wife, Karen, who has been very patient throughout this process (so far) and for her help hanging drywall, keeping track of receipts, and all other duties as assigned! You’re the best! Thank you to my son, Matt, who donated some leftover drywall, provided some tools and helped with ceiling panels. Finally, I’d like to give a big thanks to my Daughter, Lisa. She took the time, and patience, to edit this document. A labor of love indeed.
DISCLAIMER:
I am not a professional builder or contractor. What you see here is my attempt to create a multi-media (a.k.a. Home Theater) room in my basement. While I have some skills from previous home improvement projects, I don’t consider myself an expert in any discipline, so if you decide to run with an idea you saw here, you do so at your own risk. This webpage is purely for informational and entertainment purposes only — not to act as a guide on how to build such a room in your own home. Okay, enough said.
Please note that you will see bolded text in some of the descriptions and dialogue throughout this document. Most of these are hyperlinks that, when clicked, will open a new browser window and take you to a web page that will offer further description or explanation. I hope you find this feature useful. Additionally, if you click on an image, it will enlarge the view.
Okay, let’s get started.

In memoriam …
Sadly Terry passed away on Thursday June 29, 2023 at home surrounded by family. I had known him for over 45 years. He was a groomsman for my wedding in 1981 and is one of only two friends that I kept in contact with over the decades. Fortunately he was able to visit and watch a movie (Oblivian) in the Terry Mack Media Room. He left this Earth far too early and will definitely be missed by many. It was an honor and pleasure to know you. Rest in peace my friend.
INITIAL CONCEPT AND DESIGN
Once upon a time, my wife and I had a “theater” room in our home. It was located in the master bedroom on the second floor of our current home. The room measured 12’9” x 23’3” and was a place where we could go to watch a movie on a big screen (110” diagonal) without leaving the house. About five years ago, our family dynamic changed, and we had to give up our room for other purposes. In other words, it’s a bedroom again.
This project is an attempt to re-create the fun we had with a dedicated room for watching movies. In addition to movies (DVD/Blu-Ray), we could also watch TV. I had a TV tuner wired in to the system. Sporting events and shows like Law and Order were much more entertaining on a big screen. I also had the ability to connect a computer for YouTube, internet content (Netflix), or just surfing. Finally, we had a Wii system that was larger than life on a big screen. So when I say movies, it’s really so much more.
The basement was the only place where we had the potential for such a room. Unfortunately, like many basements, it was used for storage for stuff that we wanted to keep but, didn’t want to store off-site. After much debate, we decided that the north west section of our basement would be the home of our new media room. So the fun begins.

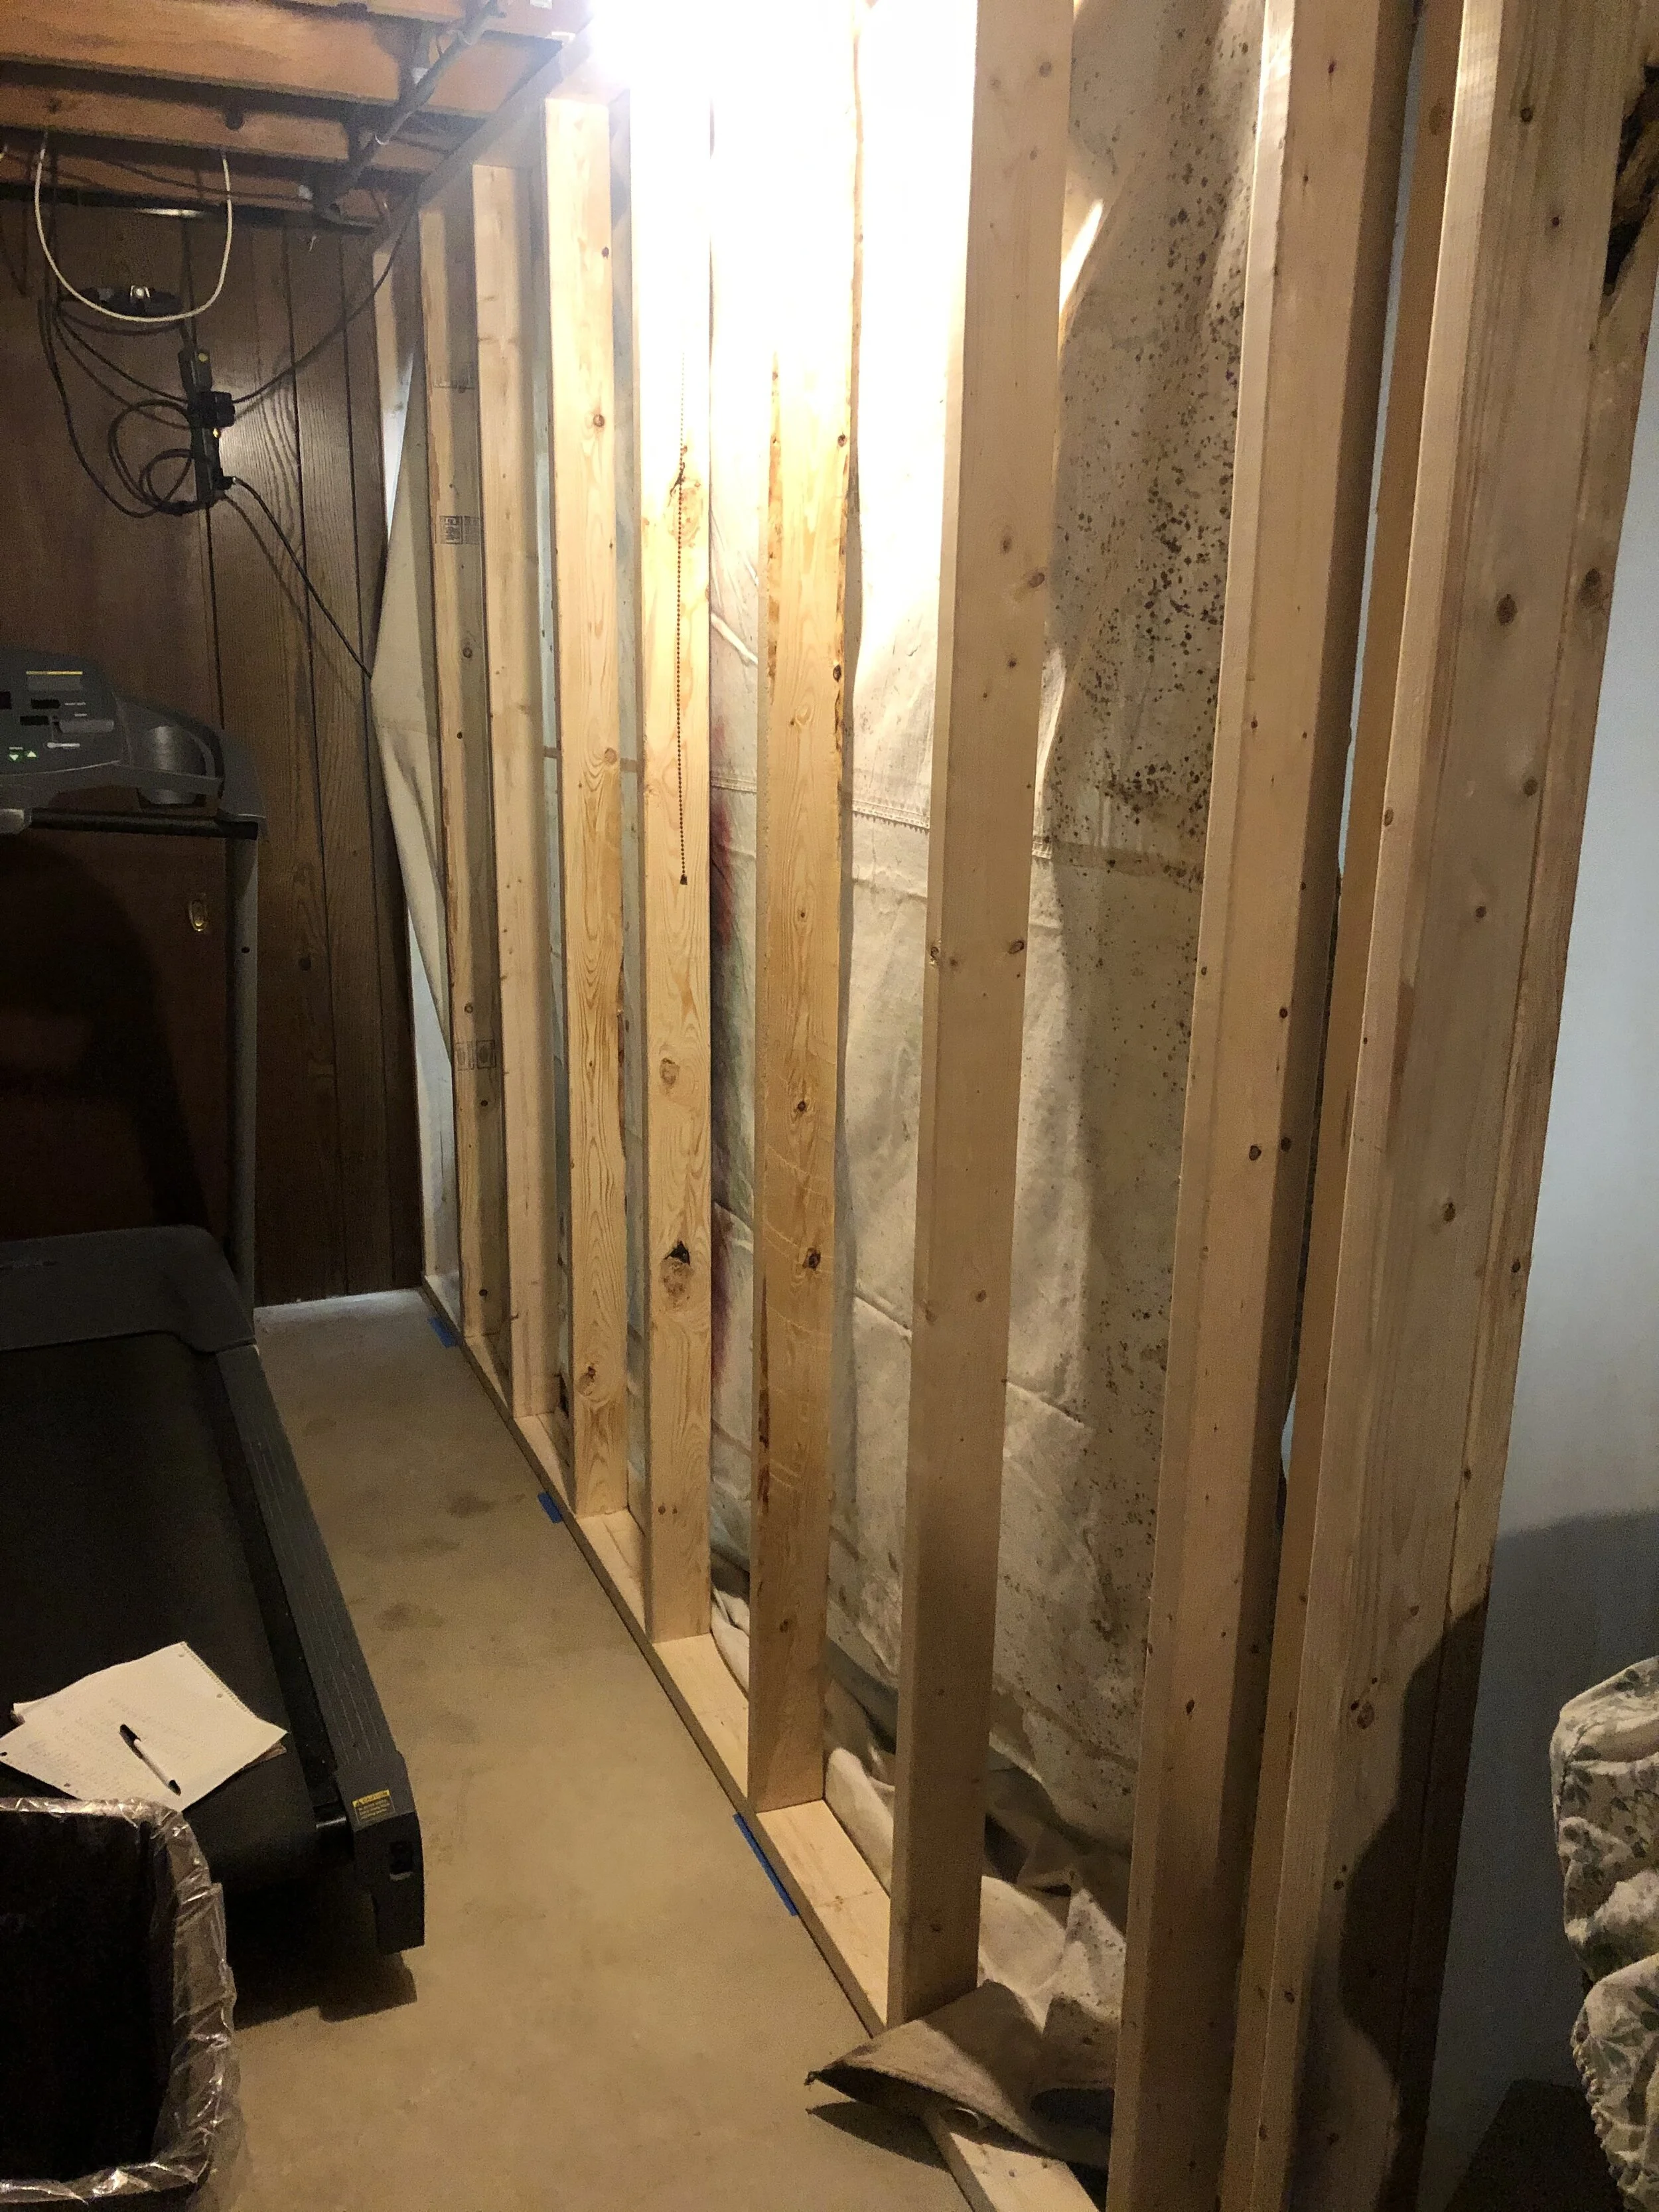
The picture on the left is what the northwest corner of our basement looked like when I came up with the initial design (see drawing above). The drawing should be turned 90 degrees to the right to give you a better orientation to the room. Hopefully, you get the idea.
It’s a typical basement, concrete floors, 86 inches (just over 7ft) from the floor to the bottom of the joists, and a big ugly I-beam and HVAC duct running horizontally through the proposed room! The clearance under the I-Beam and HVAC duct is 77 inches. Just enough for a six-foot person to pass underneath without ducking — and a little less when you subtract the framing and drywall.
Note: the drawing only depicts the I-beam.
Here’s the room after several weeks or so of cleaning, moving, getting rid of things, etc. It was quite a process. Additionally, I needed to leave some space on the side and behind the media room for storage. As much as I would have liked to take over this area of the basement, I had to be realistic.
You’ll notice in the drawing above, there are two small 4-5ft x 7-10ft areas where we’ll put some of what was in this area back, mostly shelving, and a full-size treadmill.
Note the wonderful paneling that the previous owner left me. Initially, I decided to leave it because there were studs behind it with a vapor barrier. My plan was to just put drywall over it; however, later, as you will see, the paneling had to go.
Next step, building walls.
CONSTRUCTION
My father was a carpenter by trade for over 40 years but ironically never taught me which end of a hammer to hold. Most of my knowledge was from trial and error and lots of YouTube videos.
The first thing I did was to box in the I-beam and HVAC duct. Based on my calculations, this was where the projector was to hang. It turns out later that there were some variables that caused me to rethink the projector location.
Once the I-beam and HVAC boxing was complete, it was time to start on the south and east wall.


I created a couple of time lapse videos too.
The east wall (picture on the left) had to be built in three sections. The reason is that I had to work around the build-out for the I-beam and HVAC box out — probably should have done the box in later. Hindsight can be so cruel sometimes. The north portion of the east wall also has a doorway (see the blue tape on the floor) and an equipment window where the electronics will be installed. Again (hindsight) the equipment window should have been further from the door to accommodate framing.
I also considered installing a built-in mini refrigerator below the equipment window. I did some measurements and didn’t like how far out the frige stuck out the back. Still, it would have been a nice touch. Next version.
The electronic equipment will be mounted on shelves that will hang out the back of the room allowing just the front of the devices to show from inside the room — being flush with the inside of the equipment window. This is to give the devices a built-in look. I got this idea from someone on an AV forum. Below (left) is a picture of their implementation.
Below on the right is a picture of how the equipment window was shaping up. The shelves will be painted black in the finished version.
Lumber is an interesting item. It seemed like every time I went to the store, the price of a 2 x 4 went up. The cost varied between $5.15 per stud (2 x 4 x 8ft) and $5.53 per stud. While that’s not significant for this project, imagine building a house, and the cost of lumber jumped 7% in the span of about 2-3 weeks. In my case, I spent a little over $200.00 for lumber, not including fasteners.
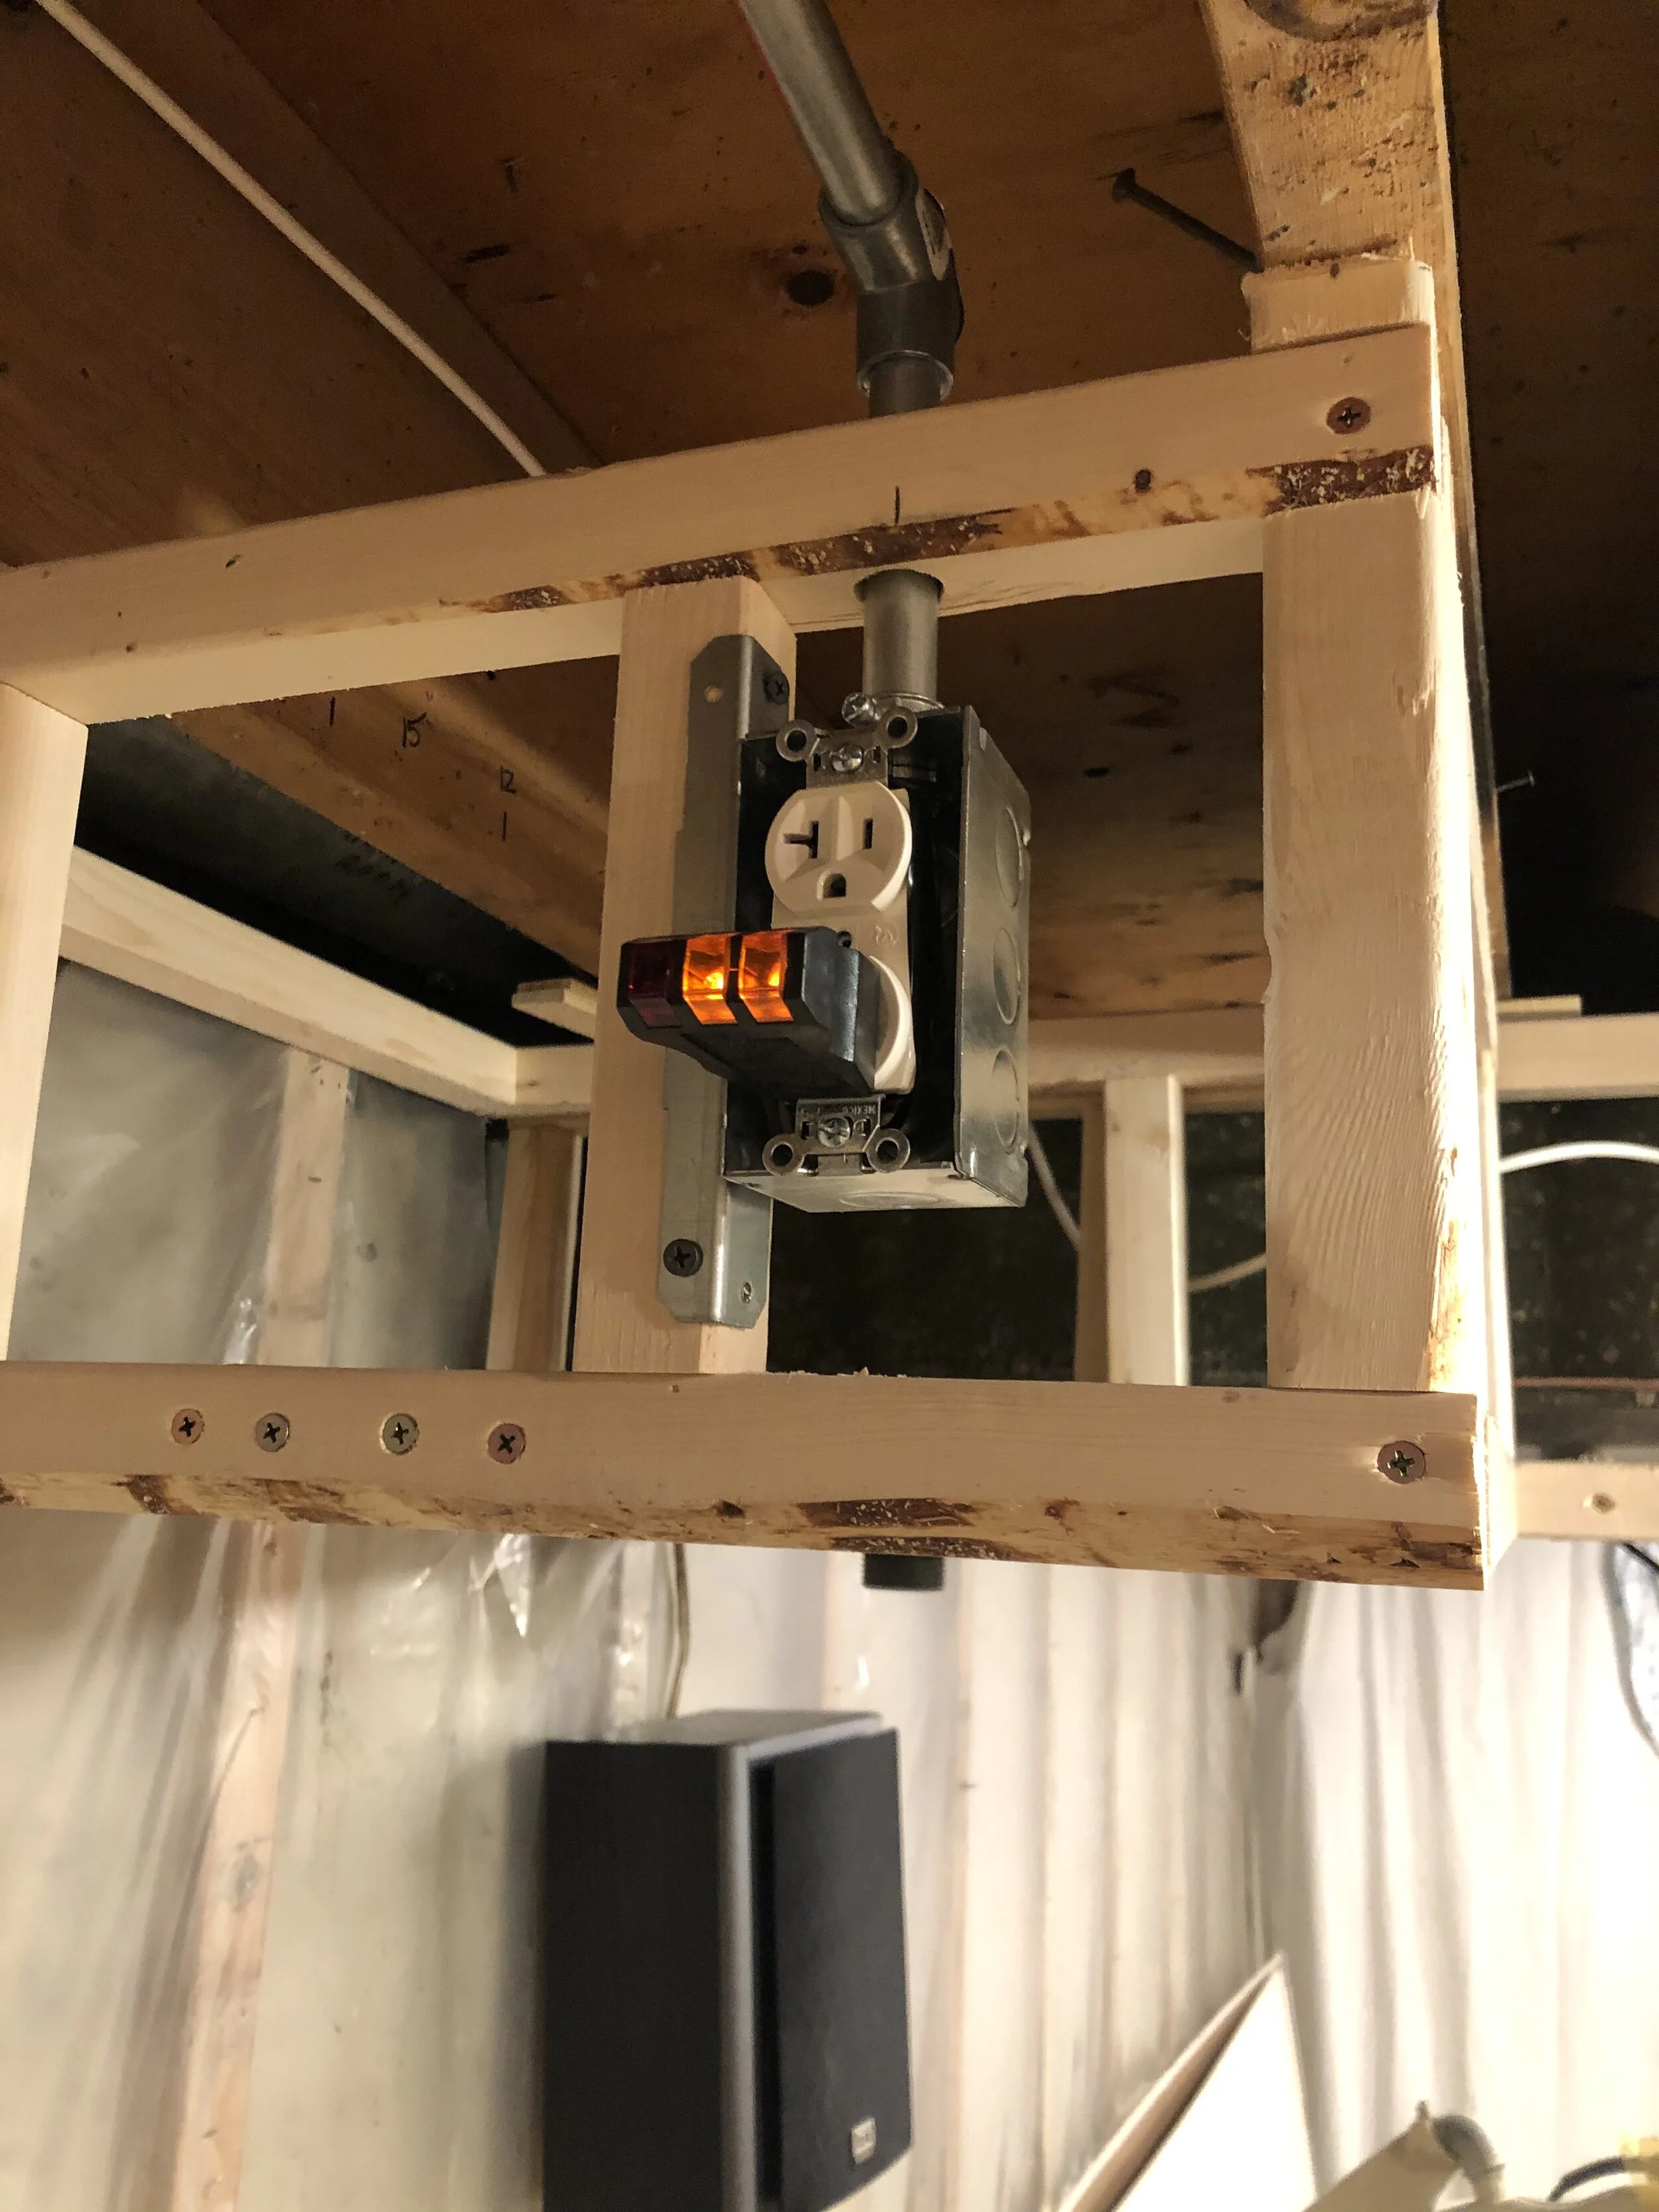
So what about the paneling? Well, it turns out that when I went to add an outlet on the north wall (by tapping off of an existing outlet), I discovered that not all of the studs holding the paneling up were properly anchored to the foundation walls. So I removed the paneling and fixed the problem studs. I swapped out the original outlet for a GFI so both outlets would be protected.


In the first picture above on the left is where the original outlet was located. I added one higher (middle picture) to be approximately in the middle of where the screen would be placed. My intention was to provide power for a potential LED light strip to go around the perimeter of the back of the screen frame to act as a backlight. In the final picture on the right, you can see the screen frame and where the outlet is located. If I do the LED backlighting, power won’t be a problem now.
ELECTRIC
The next thing I tackled was electric. The media room has 10 outlets in all with six ceiling lights. Local code did not allow Romex, so I had to pipe everything with conduit. Since I don’t own a pipe bender, I decided to use 90-degree angle pull elbows for the turns. I tapped into a 20A circuit that wasn’t doing much by piping it from one end of the basement to the other.
By using a 20A circuit meant that I had to use appropriate wire (12 gauge) and 20A rated outlets. Keeping safety in mind, I decided to use GFI outlets. These are better than a properly grounded plug because it stops the current faster in the event of a short — at least that’s what I read. Something I learned about GFI outlets is that if you chain a series of non GFI outlets together off of a GFI outlet, all of the outlets in the chain will be protected — as long as the GFI outlet is the first in the chain. By using this logic, I only had to install 4 GFI outlets out of the 10 total. That saved me about $60.00.
I also found a great replacement for wire nuts. Typically in a junction box, you tie your wires together using wire nuts. Normally this isn’t a problem until you get two sets of four 12 gauge wires that need to be connected. The answer? Wago 6-Wire Wall Nut. Not sure why they call them wall nuts. They are connectors. You simply expose about a 1/4” of wire and insert it in one of the holes on the connector. While these are a little more expensive than standard wire nuts, they are worth the price in my opinion. They are easier to use and take up less space than traditional wire nuts. I’ll never go back to using standard wire nuts again!


In the diagram on the right, I’ve designated where the junction boxes are located (A-H) and where the ceiling lights are located (1-6). The blue lines indicate conduit that runs along the top of the walls or inside the ceiling joists.
The picture below shows where I tapped into a lightly used 20A circuit. I decided to put a switch between the circuit and the media room. So in the future, if I had to do any electrical work, I could kill the power in the media room without tripping a breaker. Another reason is that the circuit breaker used for the media room handles other items, so the master media power switch allows me to power off just that room without effecting any other rooms or devices.

I felt at times like I should have had a personal parking spot at Menards and Home Depot. The switch on the left took two trips. The first trip was to buy what I thought I needed for the switch, which included a box extender, a mud ring, a switch plate, and the switch itself.
When I first tried to install the switch, the bracket didn’t fit. I fiddled with that for about 30 minutes until I gave up and decided to get a different switch bracket. Because I had the breaker off for the 20A feed circuit, I found out that the UPS for my office computer system (that uses the same circuit) only lasts about 25 minutes. Good information to know but, a bad way to verify it.
After a second time to the store, everything fit. I also labeled the conduit runs (see label on the conduit), so anyone (and myself) could follow what was done in the future. The diagrams that I created will also be very helpful.
LIGHTING
As for lighting, my original goal was to have smart lights in recessed fixtures with a drop ceiling. After much research and debating, my wife and I purchased six 4” recessed light housings by Lithonia. I also had to purchase six 4” baffle trim rings. The trim rings were almost as much as the light housings. Just checked my receipts, the recessed housings ran $71.94, and the trim rings cost $77.82. Still can’t figure that one out. Because we’ll be using smart bulbs, there’s no need for a wall switch. Although, if I wanted to add one later, it’s a simple task (using a Philips dimmable switch) with no additional wiring necessary.
The lights are Philips Hue A19 white smart bulbs. These are 60W equivalent LED bulbs that only require 9.5W of power. They put out 800 Lumens each and are fully dimmable.
So why Philips you might ask? We already had 18 Philips bulbs throughout the house, so it made sense to stay with the same family. The bulbs are “Alexa” aware and can be controlled via voice, with a battery-operated dimmable switch, or a smartphone app. I have several routines that incorporate the bulbs for various needs. As for the media room, I’ll create a routine that will power off bulbs 1-4 and dim bulbs 5 and 6 for movie viewing. Alexa, let’s watch a movie!
I was surprised at how much light these bulbs yield. Wondering if four would have been enough. At least they can be dimmed!


Speaking of lighting, before I had the recessed lights up and running, I had to use temporary lights to work in the room. Initially, I had a 40” fluorescent bulb fixture, but that didn’t illuminate the whole room. I eventually found an Outlet-to-Socket Light Plug, where I used standard LED bulbs and plugged them in to a long surge strip. Two strips with three bulbs each did the trick. See photo on the left.
I connected the surge strips to a Philips Smart Plug, giving me the ability to turn all six lights on and off with my voice or with my phone.
So just some thoughts on smart plugs. I’ve tried a few different brands: WeMo, Stitch, and Philips. I got rid of the WeMo smart plugs because they would lose their programming after a power outage. While this didn’t happen very often, it was a pain to reprogram them.
The Stitch (by Monoprice) smart plugs had the most features but may have been discontinued. They’ve been out of stock for almost a year. I have about eight of these. Finally, I decided to give Philip’s smart switch a try. It seems well made (heavier than the others) and integrated with my Hue smart lights. It can also be controlled from a Philips dimmable switch. The Philips smart plug is more expensive than the Stitch, but it’s available.
LOW VOLTAGE WIRING
The next task at hand is low voltage wiring. This includes speaker wire, network (Ethernet) cable, coax (for TV signals), and, of course, video cables.
The first to tackle was the speaker wire. This wasn’t nearly as hard as electrical wire, but I did have to drill pass-through holes in the studs and joists to run it properly. After I got all of the speaker wire run, I set up my AV receiver and plugged everything in. I needed to make sure that all of the connections work! And what do you know, it all worked the first time out, and despite not having any real walls, it sounded great. I can only imagine what it will sound like when the room is finished and balanced.

The AV receiver I have was purchased many years ago as a TIAB or Theatre in a Box. It included a THX-certified 7.1 surround AV receiver and 8 speakers. The AV receiver has a microphone that you can use to balance the speakers in a room. Looking forward to seeing if there is a difference.


In the image on the left, I’ve shown the placement of the speakers in blue. The big one is, of course the sub-woofer. While I made provisions for a second Sub in the back of the room, I doubt that I’ll need it. I’ve cranked this up with the movie Rogue One and one Sub might be just enough.
The screen will help to orient you to the front of the room.
In order to future proof the room (thank you, Terry), I’m running additional cables from the AV equipment area to the projector. This includes three CAT5e Ethernet cables and a set of composite (also known as YPbPr) video cables. Early testing showed a flaw in the 25ft HDMI cable that I used successfully before, but for some reason isn’t performing now. I’ve ordered a replacement. Here is a list of the cables that will be run to the projector:
One HDMI audio/video cable for primary video use, a set of composite video cables for a backup, a single video (RCA) cable, an HD15 (SVGA) cable to connect a computer output, and finally, three CAT5e Ethernet cables.
The Ethernet cables won’t be pinned until I need them. I’ll have them tucked in the ceiling for future use. What might that be you ask? Well, my current projector was purchased in 2008. So it’s a bit long in the tooth, however, you’d be amazed at the picture it can produce. Anyway, in the future if I need to purchase a replacement projector, it may have connections that I haven’t thought of, such as a network connection for internet access, or USB for remote or gaming controllers, etc. The good news is that the Ethernet cables can support things like USB or even HDMI with the proper adapters. There are many HDMI extenders that use Ethernet cable as the backbone. The same goes for USB. So having these cables will help to future proof the media room. Let’s hope I won’t need fiber!
DRYWALL
At this point in the build, I had hoped to have all the wiring completed and tested; however, I had a problem with an HDMI cable and had to re-order. As of this post, I’m still waiting on that. I decided to begin hanging drywall anyway. I could do the outside of the room without compromising my ability to adjust wiring inside the room, so off we went.


Hanging drywall is pretty boring, and probably more so to see progress pictures of it. Sorry. So you might be saying, why didn’t you cut out the equipment window (last picture on the right) ?? Well, before I went any further, I wanted to test for heat build-up in the room.
When we had our previous theater room in our master bedroom, the projector doubled as a ceiling-mounted space heater. Despite the size of the room, the projector would heat the room to a point where you felt sleepy. At one point, we purchased a small window air-conditioner and would pre-chill the room to about 68 degrees or so, then watch our movie. The air-conditioner was too loud to run during a movie, so we tried to compensate at the start. My fear is that the new media room (which is 59% smaller - based on cubic feet) will heat up the same way.
To test this, I plan to block off the doorway with scrap drywall and monitor temperatures in the room during a 2-2½ hour movie. This will give me an idea of whether or not I’ll have to vent the heat from the projector or not. My hope is that because it’s a basement and is partially below grade, it will provide a cooler environment naturally. It’s a tough job but someone has to do it.
UPDATE 09/09/2021: I’m happy to report that the room does not heat up excessively. In the summer, it starts around 68 degrees and after a 2 hour movie only gains a couple of degrees. In the winter however, it gets down to about 64 degrees. That’s a bit cold. My son gave me a small space heater he wasn’t using that I can use to pre-heat the room. Never thought I’d have to do that.
FLOORING
I’m going to take a quick detour and talk about the floor for a moment. We purchased a carpet several weeks ago after looking at samples ad nauseam. After finally deciding on a color and style, we thought we’d better get it sooner than later. Our fear is that it would be out of stock at the time when we needed it. Carpeting is sold in 12ft widths, and our room is about 10ft wide, so there will be a fair amount of waste. Additionally, I think it will be daunting to trim it properly in the room with so much overlap.
To fix this, I decided to create a paper template of the floor. This way, we could mark the carpet with the template and cut it slightly larger than the size we need. When it’s time to install, we only have to do some minor trimming. Here are some pictures of the process:


We purchased a roll of 30-inch wide by 50-foot long craft paper from Hobby Lobby for around $12.00 (with a coupon - thank you, Lisa). Now all we need is a nice day to roll the carpet out on our driveway and do the cutting.
After talking to several carpet “experts,” we decided that we’re just going to lay the carpet on the floor directly, no pad, no sub-floor, etc.
What I wanted was to give the room a nice look, provide some sound absorption, but not really add comfort. After all, in this room, you walk in, sit down, and enjoy a movie.
If you’re curious, it took four runs to cover the floor, which used up all but a few feet of the paper.
Next time I try to freehand a pano video, I’ll ask my son if I can borrow his steady cam adapter. ☺
THE SCREEN
The screen is what makes everything else worthwhile. Based on personal experience, I can tell you that a screen will make or break your home theater experience. When my wife and I were shopping for a screen many years ago, a salesman at ABT saw me looking at the various models on display. He said, “Which one do you like the best?” I pointed to one. He said, “That screen is using a $500.00 projector.” He pointed to what would have been my second or third choice and said, “This one has a $4,000.00 projector.” I said, :Why such a big difference? Wouldn’t a more expensive projector produce a superior image?” Nope. It turns out that a poor screen can make even the best projector look second rate. We wound up purchasing a Stewart FireHawk fixed screen with a 110” diagonal view.
When it was delivered, I assembled it and mounted it on the wall. I set up the projector and fired up a movie. I was a little apprehensive because the screen was silver. I originally thought a white screen would have been better, wrong again. The image was incredible, to say the least. The rest, as they say, is history. After disassembling the master bedroom theater, I asked my son to keep it at his house. It’s back, and I have to say, I forgot how large it is. Here are some pictures showing it where it’s supposed to hang.


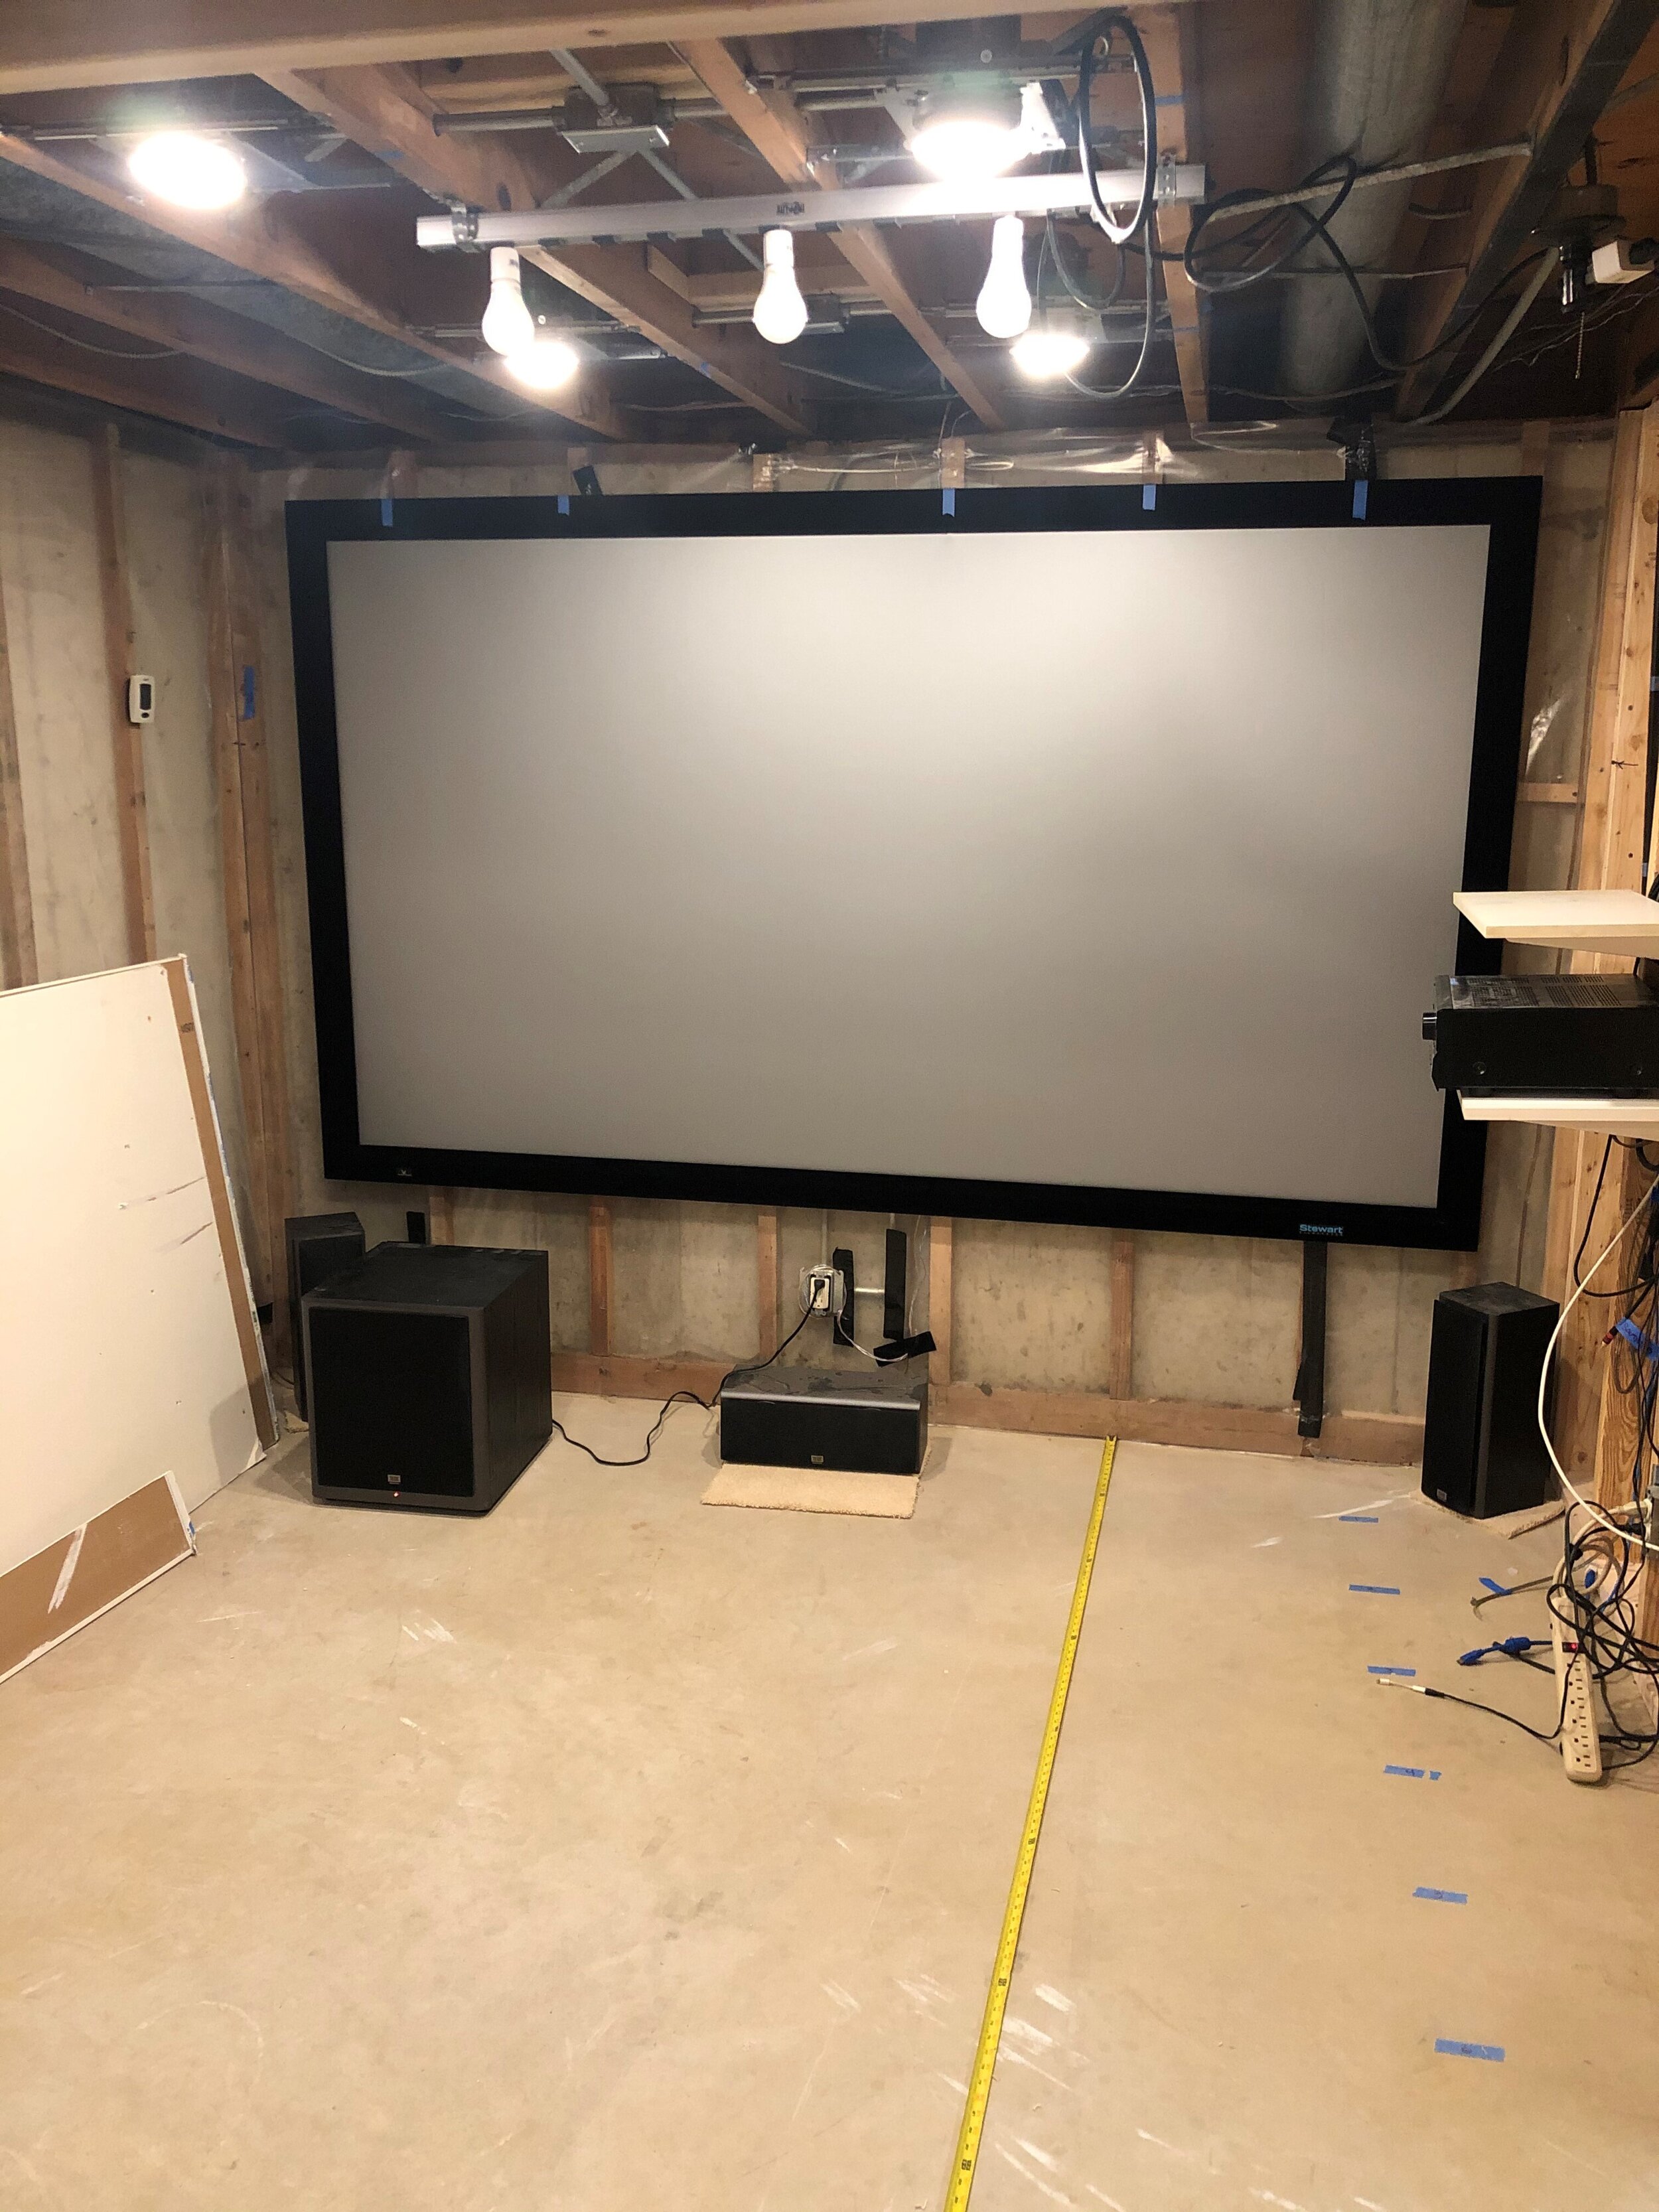
When the room is complete, the screen will be where it’s located in the pictures above, but my goal is to have it sit on a frame on the wall, so it’s offset about 2 inches. This way, I can install LED strip lighting around the perimeter behind the screen to create a backlight effect. Philips Hue makes such a solution, but it is very expensive. I’m looking in to some alternatives that are less costly.
So at this point, I’m at a crossroads. I’m waiting on a replacement HDMI cable, which will need to be tested, installed, and tested again. I still need to make some changes to the ceiling to accommodate the projector’s new location. I will probably have to move the outlet too. Currently, I have an outlet installed in the center of the room in the I-Beam and HVAC box out. I have to do the heat test to the room because that will determine if I need to add additional venting. After those hurdles are completed, we can start installing drywall on the ceiling, then on the inside of the room.
Once the drywall is finished, it’s time for paint. We picked out colors for the ceiling, walls, and trim, so back to Menards. At some point, I need to order a door. I need to install shelves in the equipment window and trim that out. Install the carpet and then the baseboard trim. I can then install the screen permanently, install and wire up the projector, bring in the furniture, and with any luck, give the room a test run.
I’ll be adding more dialogue and pictures to this web page as things progress. Thanks for taking the time to view some or all of this. If you liked this, have any questions or suggestions on the room or my webmaster skills, please use the comment form below. Thank you, and stay safe!
NEW UPDATES - 10/24/2020
We purchased the carpet for the media room weeks ago, but never did anything with it. It was decided that we needed to trim the carpet (before the weather turned bad) to within 2-3 inches of the size we would need when it’s time to install it. To aid with cutting, we created a template of the room with paper. So we laid the carpet out on a flat surface (our driveway), taped the template to it, then cut around the template to get the carpet to our rough size.


The wind that day was mild, but, it created some problems converting our template into a sail. We eventually got it cut and rolled back up for a later installation.
UPDATE - 10/27/2020
Well, we’re back in construction mode. Over the past weekend, I decided to try and finalize the location of the projector. As it turns out, the projector needs to be moved back further from the screen than I expected. Originally, I was going to mount it on the box out for the I-beam and HVAC duct in the center. Nope. The throw distance on this projector doesn’t leave a lot of room for error, so to compensate, I decided to add an extension to the box in so I could increase the distance between the projector and the screen. Instead of the middle, I added the addition near the west wall. This also meant that I needed to run another outlet to power the projector.


Had I extended the box out in the center of the room, the projector would have been an aerial hazard for anyone over 5ft 7in. As it turns out, the projector has the ability to change the keystone of the displayed image, so it’s straight even if the projector is on an angle. Pushing the location of the projector to one side of the room wasn’t too difficult, and adjusting the keystone is fairly straight forward. Below are some pictures that illustrate how to correct overlapping of the image and fix the keystone orientation.


In the first picture above, you can see how the image overlaps the screen, especially on the sides. In the next two pictures, aligning the arrows in the corner (click on the picture to enlarge) will adjust the image to fit on the screen and appear rectangular. In the third picture, the image now fits on the screen without any overlapping. In the final picture, older movies used letterboxing to compensate for movies that didn’t fit on a rectangular screen. I remember hating this “feature” back when I had a LaserDisc player. One of my movies (Alien) was letterboxed so drastically that the black bars took up 33% of the viewable image. We had a 35” TV back then, so it was like watching an 11.9” screen. Today, movies are being shot in an aspect ratio to fit better on a rectangular screen.


UPDATE 10/28/2020
Today was all about the equipment window. I cut out the drywall, installed the shelving (temporarily), and started to install the speaker terminals. Before I get into the details on that, I want to show you a new toy I bought over the weekend.
Don’t get me wrong, this new tool will be very handy. What I don’t show in the video on the right is that I had to do some adjustments with a rasp to clean up the rough areas. I imagine, with practice, I’ll get better at using this tool.
I saw this gizmo used in a few YouTube videos where it was used to cut out around outlets and recessed light fixtures. It looked like it might be a useful tool to have for this project and for future needs.
Most places were selling it for $60.00 or more. Found this one at Harbor Freight for $25.00.
Below is a short video demonstrating my attempt to use this thing for the very first time.
So back to the equipment shelf. I cut out a couple of temporary shelves and hung them up and put the AV receiver and the blu ray player in place. So far, so good. Next, I installed the speaker terminal plate.


The top shelf for the AV receiver is made from plywood. The shelf for the Blu-ray player is made from a piece of scrap drywall. I used the AV receiver shelf as a template and used the new cutout tool to make a duplicate. When I do this permanently, all the shelves will be made from 1/2” plywood and be painted black. For now, this will suffice while I get the speaker wiring finished. I need to add two more shelves; one for a computer and the other for miscellaneous equipment.
The good thing about putting the electronics in the equipment window is that I can finalize where the cables will be run. Up to this point, I was overestimating the length, so this will allow me to dial it in more accurately — except for the fixed-length cables like the HDMI.
Okay, back to work. I decided to go with banana plugs for the speaker connections. These are quick plug-in connectors that are easier than using the screw terminals.


While these plugs make connecting and disconnecting speaker wire easy, they are murder on your hands to assemble. Only 42 more to go. Where’s the Ibuprofen?
UPDATE 11/1/2020
Over the weekend, I accomplished a few more tasks. First, I added some venting for the projector. While it may not be necessary, I’m providing some static venting. The idea is that because heat rises, it will be forced out the side of the projector directly under a vent then up and out of the room. That’s the theory anyway.
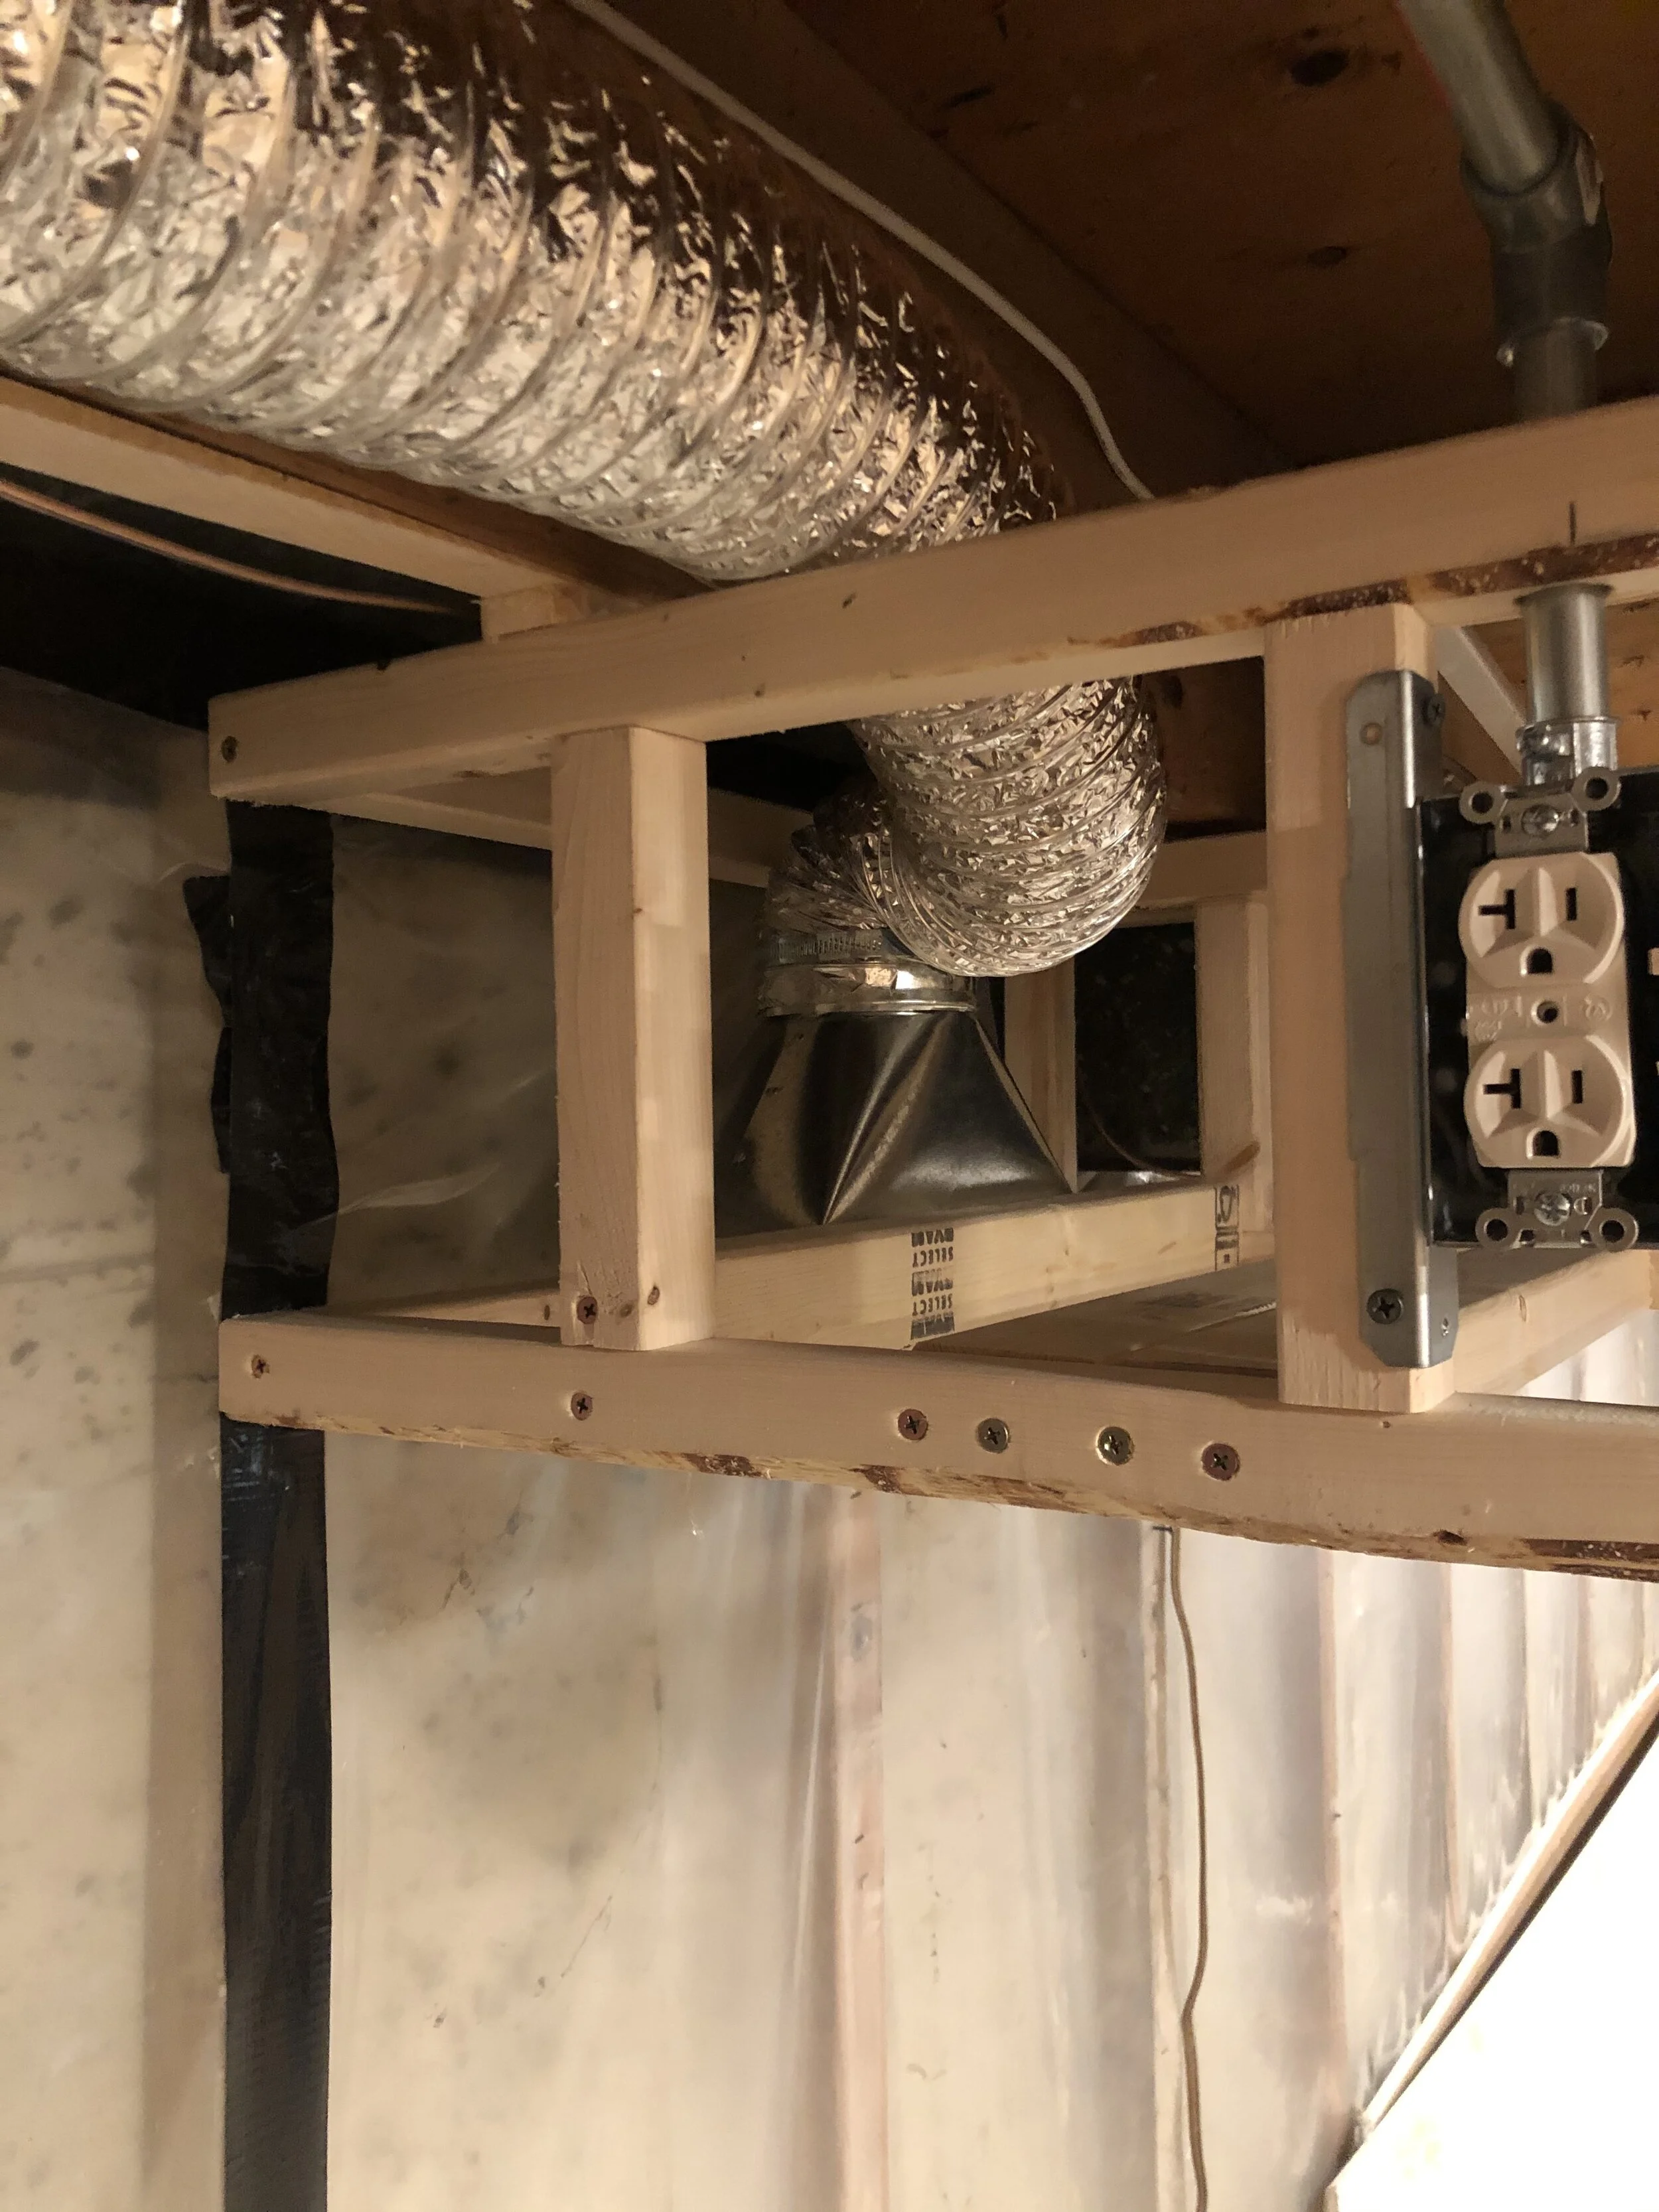


When I do the sheetrock, I’ll add a vent cover to make it look better. For now, it’s looking a bit raw. I also have to secure the flexible foil duct that leads out of the room in the basement proper. If, for some reason, the static venting doesn’t do the trick, I can add a fan to provide some suction to pull the heat out. I’ve researched a few powered solutions, and the Cloudline S4 looks like a winner. It’s an inline duct fan with a speed control. Hopefully I won’t have to go this route.
I’m continuing to refine the equipment window. I’m now up to four (temporary) shelves and still need to do some testing before I can finalize this part. I also added a monitor to the front of the equipment window. This is so I can make adjustments or test video output without having to power up the projector every time. Here are some updated pictures.


At the top would be the monitor. On the first shelf is the Onkyo AV receiver. On the second shelf is the Blu-ray player. Third shelf is a digital decoder (on the left) that provides TV reception from our rooftop antenna (no, we don’t have cable TV) and on the right, a Windows 10 computer. The computer will provide internet access to Netflix, YouTube, and digitized movies on my network. Finally, the fourth shelf is for the computer’s keyboard and mouse. When the media room goes live, I’ll have a wireless keyboard with a built-in trackpad so I can navigate from my viewing seat.
The final item is a universal IR controller. This device provides infrared control of any device that has an infrared remote. It broadcasts the signals in a 360-degree spread, so it doesn’t have to be pointed at a specific device. Finally, it allows the control of remote-controlled devices from a smartphone or tablet. Why you might ask? Well, first there are four remote controls used to control equipment in this room: the AV receiver, Blu-ray player, digital decoder and the projector. Rather than juggle these remotes individually, I can program all of them in to one device. Not only that, but I can customize the programming to include more than one device on a single scrolling screen.

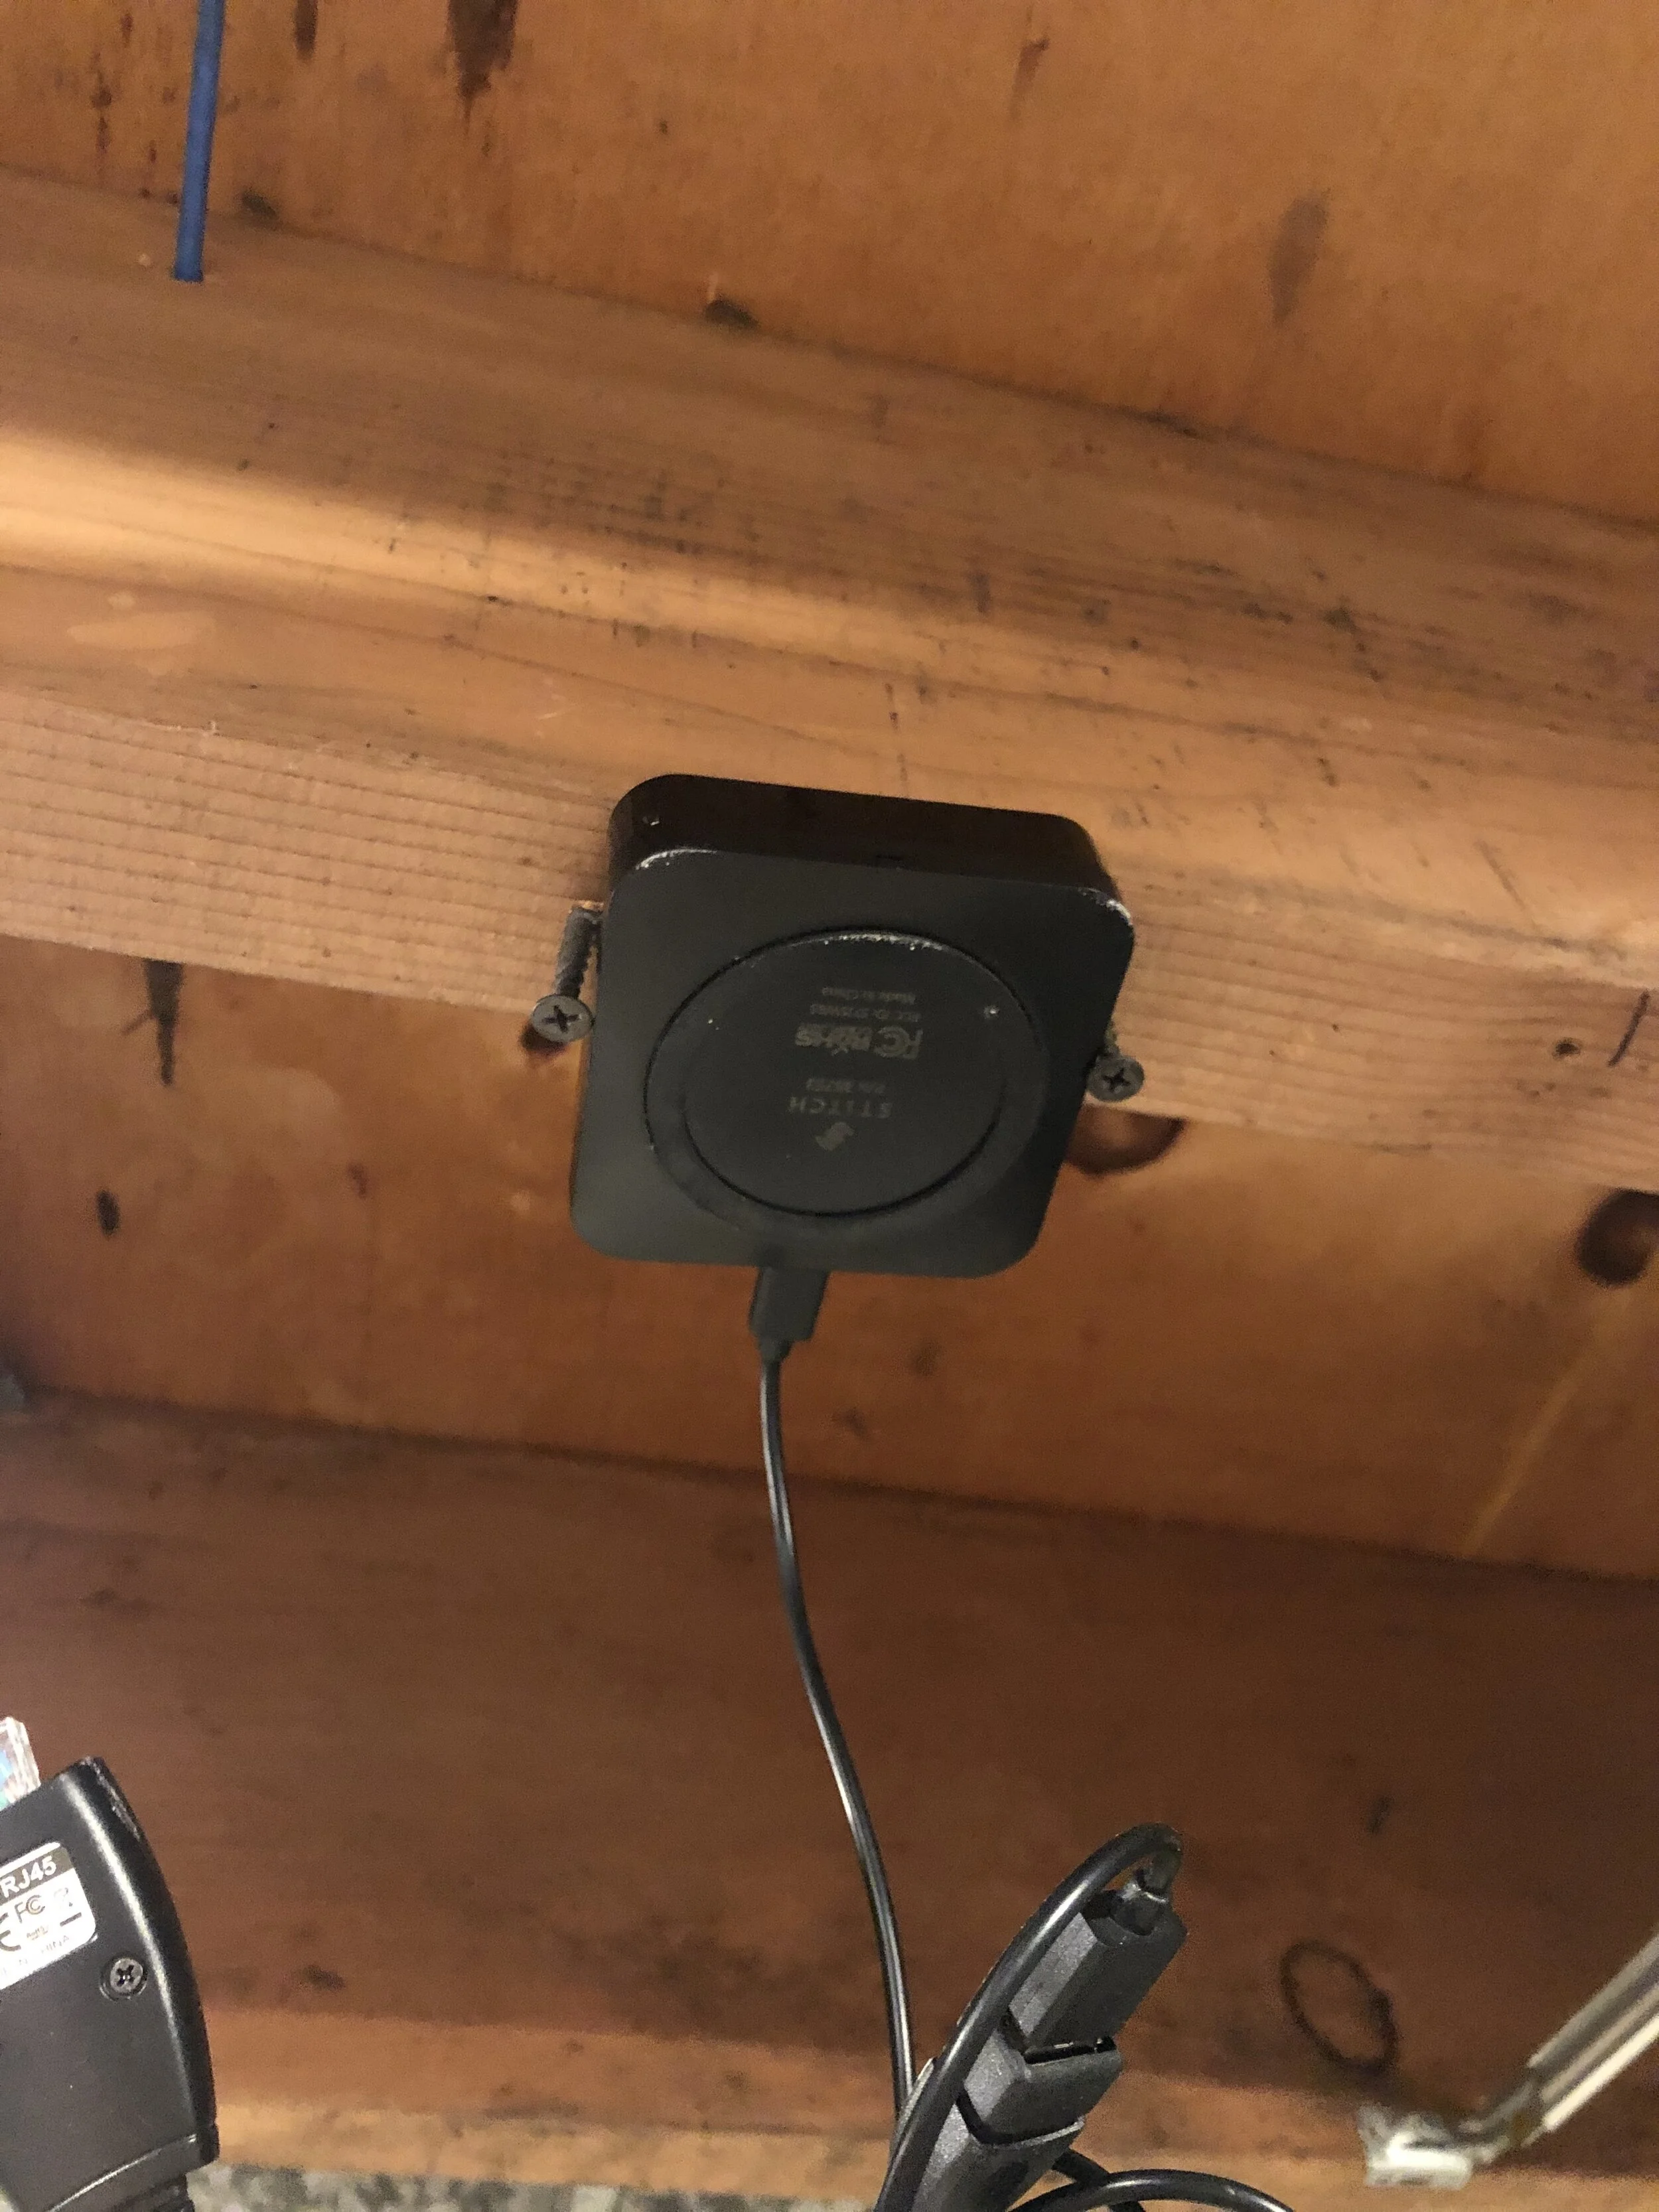


The universal IR controller is a product of the STITCH family of devices sold by Monoprice. It’s basically an IR blaster, but because it broadcasts the signals in a 360 degree format, it can be located where typical IR blasters won’t work — this is especially important for me because I have remote controlled equipment in two different areas of the room. With a typical IR blaster, I’d need two. In my case, I’m mounting it to the ceiling in the middle of the room. From there, any device that would use an IR remote can be controlled through this device.
The device requires 5VDC to operate, so rather than wire up another outlet, I decided to use a USB extender (also sold by Monoprice) to provide the necessary power. I currently use these extenders to power my outside webcams. I’ll mount the device on a spring-loaded ceiling access panel, so if I need to get to the USB extender, I can just pop off the cover and get instant access without cutting into the ceiling. The panel can be painted to match, so it’ll be nearly invisible.
I had this IR controller in my living room to control the TV, AV receiver, DVR, Blu-ray player, etc. It really worked well. I will admit that when you want to change the volume on a device, you have to repeatedly tap the “VOL UP” or “VOL DOWN” button to do so. I wish they allowed the use of a slider. Also, there isn’t any tactile response when using this on a smartphone or tablet, so you couldn’t blindly press a button like “MUTE” or “PAUSE” without deliberately looking at your device. Small concessions for the convenience it delivers. The device is out-of-stock at Monoprice, but when it’s back, I’ll get another one to put back in the living room.
NOTE: As of 03/13/2021, it appears that the Universal IR Remote is no longer available from Monoprice. I did a search and it can be found on Amazon. Amazon is showing this item as out of stock. No doubt. Another on-line venue (overstock.com) is also showing this item unavailable. I hope mine never breaks!
That’s it for the moment. I’m still waiting for a replacement HDMI cable … was supposed to be here 10/30/2020. Once that’s installed and tested, I can start installing the ceiling.
UPDATE: 11/16/2020
It’s been a while since I did an update, so I’ll try and cover all that’s happened in the past couple of weeks. As mentioned in a previous update (11/01/2020) I installed a vent to draw away the exhaust from the projector. At that time it was a static vent. I’ve now added a small fan to help draw out the heat if necessary. The best part is that is cost me nothing but some time.
I had several 12V DC powered fans laying around, so I thought why not put one to good use? Initially, I matched it up with a 12V DC power supply, but that turned out to make too much noise. It turns out that the 12V DC power supply was actually putting out approximately 15-16V DC. That was making the fan run much faster (and noisier) than normal. I switched to a 6.3V DC power supply that puts out approximately 9V DC. While this is slightly under powered, it creates enough of a vacuum to pull the air out of the vent, and still remain very quiet.
Keeping safety in mind, I soldered the connections and sealed them in heat shrink tubing. Here are some pictures. The process took about 15 minutes.


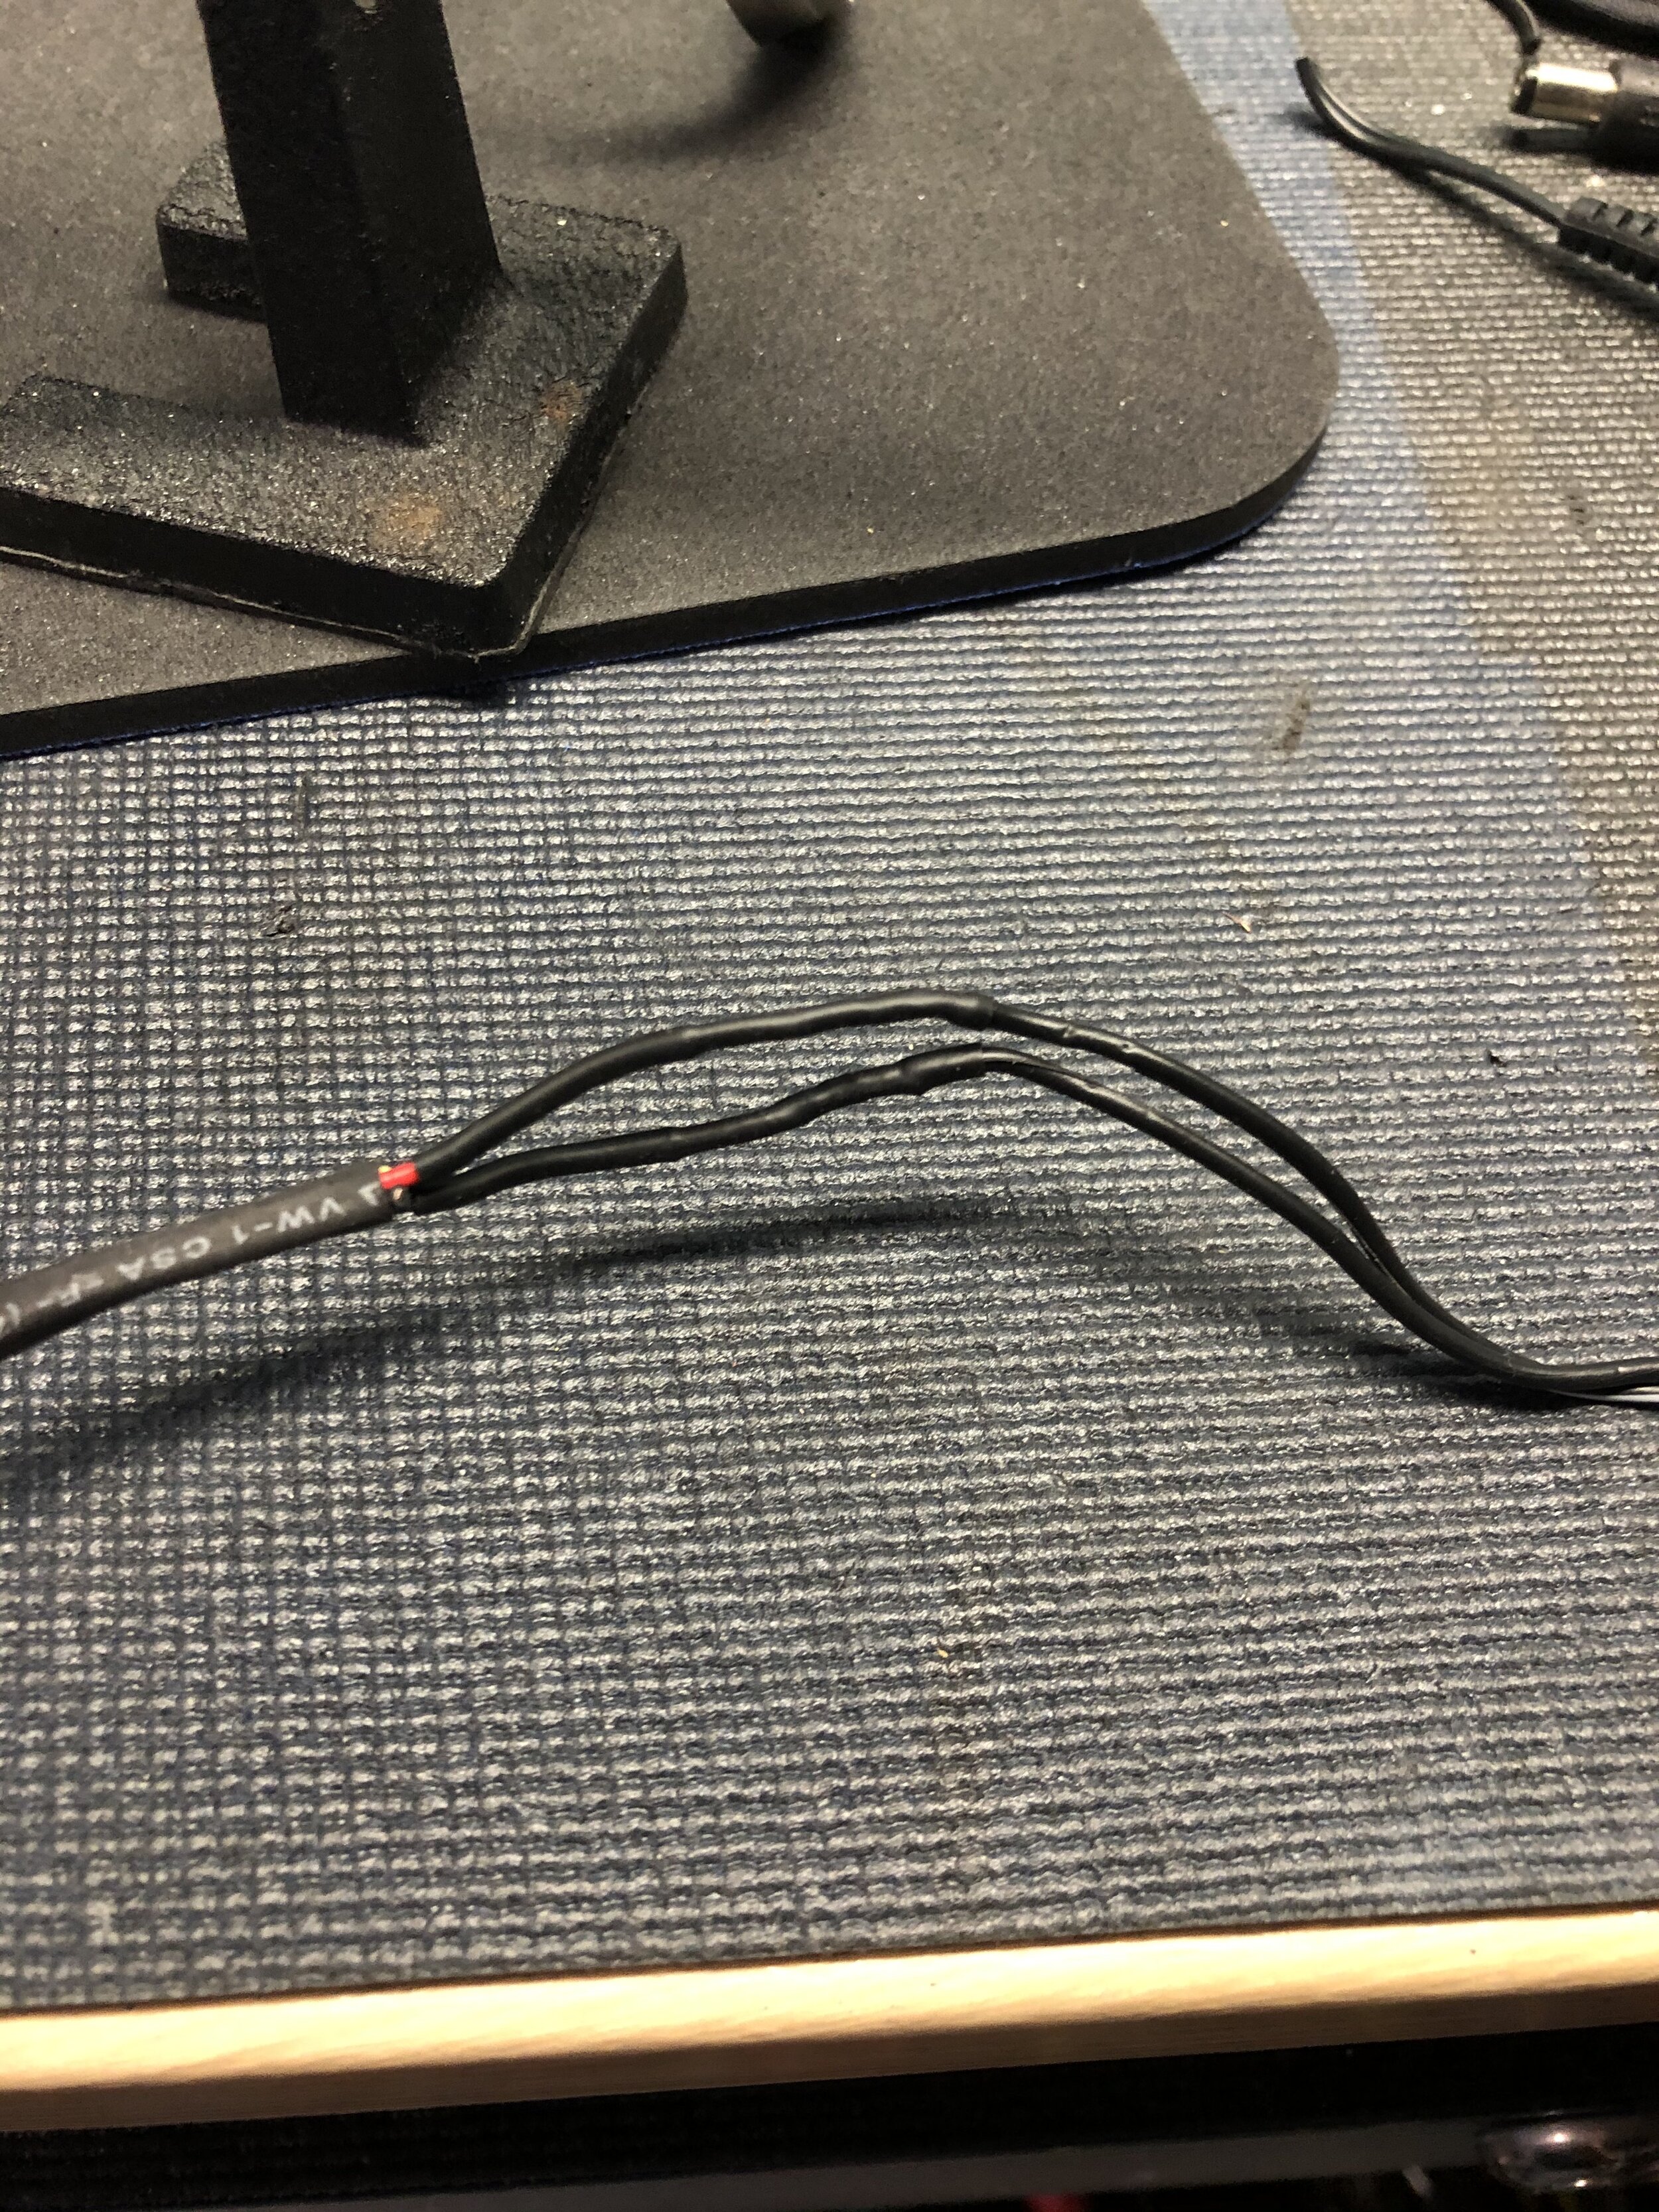


I lucked out as the fan fit inside the flexible duct. Because it doesn’t spin very fast, there is little change of it wiggling out and falling. You may have noticed that the DC power supply is plugged in to a smart plug. This is so I can turn the fan on and off through a smart phone app, or via voice command using Alexa. I think my venting problems solved. The true test will be when I actually watch a movie after the room is finished.
Some other accomplishments that happened. I re-formatted the computer designated for the media room. I completed the low-voltage wiring. I capped off an old ceiling light fixture that would have been in the way when installing the ceiling. I added insulation to some low-voltage wiring to prevent any possible overheating. A phone line extension for the living room (located directly above the media room) needed to be relocated. I ran a new line and re-routed the phone line as needed. This allowed me to tap off that connection and provide a voice line for the media room.


With those tasks completed, I could begin installing the sheetrock on the inside of the room. I started with the ceiling. I used a trick from one of several YouTube videos. I installed a temporary 2 x 3 as a ledge on one side of the room, and used another piece, placed a little over 4ft. away that will carry the other end. It’s hard to describe. Below and to the right is an excerpt from one of the videos that demonstrates this technique. Unfortunately I didn’t have to foresight to film this myself.
Thank you to Home RenoVision DIY for this video
These particular sheets of drywall were left over from a previous project when we replaced one of the walls in our garage. The green color indicates that it’s mold resistant — not something that is really necessary here.
After the first sheet was secure, it was time to cut the holes for the lights. Remember the toy I talked about in the 10/28/2020 update? It was basically a roto zip tool. A drywall cutting drill is how I would describe it. Well I found out that the operator (that’s me) needs way more practice. Below is an example of how not to use this tool.


This is where we’ll see how good I am at fixing mistakes. I’ll update this sub-project at a later time. From this point on, I decided to use the old fashioned keyhole saw. The results were much better.


I would be remiss if I didn’t mention my son and his ability to lend me the right tool at the right time. Because I had to kill the power to the media room to cut the holes for the lights, I needed an alternate light source. Matt to the rescue.
This is a Milwaukee cordless dual-power tower light. It definitely puts out an amazing amount of light - 2500 Lumens, or around (2) standard 100 watt bulbs. Click on the bolded title for more info. Below are some additional photos of the unit I’m using.


In all, we got two full drywall sheets hung and cut out holes for the first four lights. Another hole was necessary to accomodate the 360-degree IR blaster. This device will be ceiling mounted. I purchased a round access panel from Menards to allow the device to mount to the ceiling, but still give me access to the wiring above. The IR blaster requires 5V to operate, so I ran power via a USB extender.


The actual IR blaster will be mounted on the plate with double-sided foam tape. That will be done after the ceiling has been painted so the plate can be painted to match. I’m going to use two more access plates to allow for access to two HVAC duct dampers. These allow the flow through the duct to be controlled. It’s essential to have access to these dampers if you have to balance your heating/cooling system.
That’s it for the time being. Now it’s just a matter of finishing the ceiling, then the walls. Starting to see the light at the end of the tunnel. Thanks for looking.
UPDATE 12/17/2020
Hi Everyone. It’s been a while since my last update. Happy to report that the entire room is now dry-walled. I didn’t think it would take that long. Unfortunately I wasn’t as motivated as usual. Aches and pains were another reason. Trying to keep the intake of Ibuprofen down as much as possible. Another reason is trying to keep from buying any additional sheets of drywall while working with what I had. In the end, I did break down and purchase six sheets. Those are a bear to get down the stairs. See video below.
Drywall part 1
Drywall Part 2
Handling a sheet of drywall is tricky. I’ve seen videos where workers handle two at a time. No way. Anyway, this gives you an idea of what kind of awkward movements are necessary to get a piece to the basement unbroken. A sheet of 4ft by 8ft 1/2 inch thick dry wall weights about 57lbs. The stuff I’m using is called “lighweight” and weighs in at a mere 44lbs. While it’s not the weight so much, it’s the size of the sheet.
Since I have a turn in my stairway, the drywall sheet needs to be flipped in order to navigate the turn. There were times when I heard the sheet creaking as if it was going to snap. That would have been a waste of $7.16, and forced another trip to Home Depot. Fortunately, they all made it safe and sound. Thanks to Lisa, my daughter for filming, and to Ellie, my granddaughter for managing the door.
Below are some pictures of the room. I know it looks like a patchwork quilt, but after taping and priming, it will look much better.


While in some photos it looks like the sections are much smaller, it’s because I snapped a chalk line to show where the studs are located. This makes screwing in the panels much easier. All but one of the outlet cut-outs came out perfect. The south wall, my first attempt was a learning curve. After taping, you’ll never know that happened. As for how much was scrap — this is in part because the bulk of the drywall came from my son. He had a business where he created a paint booth that when disassembled yielded many usable pieces of drywall. However, some pieces were either too damaged, or odd sized and were destined for the dumpster anyway. It helped me to acquire the used drywall, and it helped my son to get it out of his garage. A win win in my book.
The next task is to tape and sand. This will be the messiest part of the build. Drywall dust gets everywhere. It’s like the herpes of the building world. After that, a coat of primer then a coat of color and it’s time for the carpet. After that, things should fall in to place fairly quickly. My estimate is mid January for completion. A little longer than I had planned, but I really don’t have a set schedule. It’ll get done when it’s done. Hope to have some in-process updates during the taping portion. Stay tuned.
UPDATE 2/16/2021
FINISHING THE DRYWALL
Taping and sanding isn’t the most exciting topic to discuss. Unless you’ve tried to do this on your own, you might say “what’s the big deal?” I can tell you it’s both frustrating and rewarding — especially when you’re done! Here are some pictures showing some of the states of taping.


This is the first time I ever attempted a drywall ceiling. Have to say, Ibuprofen deserves half the credit. Doing build outs, or bulkheads were also something new. I originally planned on using plastic corner bead, but couldn’t get it to work. Metal bead it is. Here are some pictures detailing that.


And there were several mishaps along the way. This included cutting holes too large, and taping that had to be redone.


PAINTING
With the nastiness of taping and sanding completed, the next step was painting. This will require two coats of primer to all surfaces, then two coats of a color paint to seal everything. After priming the room, it looked very weird — almost sterile. Note, some of the pictures were taken right after applying the paint so it may be drying which can come off as splotchy. Fortunately, two coats did the trick.


So naturally after priming, I applied two coats of color. The video shows painting the north wall. I wish I could paint that fast! One wall in 32 seconds.


DOOR
I was really dreading this installation. I’ve never done a door. I guess that should be no reason not to try right? Well, let me tell you it was a learning experience. Long before buying the door, I watched what seemed like countless YouTube videos on how to install a pre-hung door. Some videos recommended taking the door off the hinges first, others didn’t. I took mine off the hinges — but while laying on its side. BIG MISTAKE. When I did that, the frame had no support when I tried to stand it up. So if you haven’t already guessed, it broke in to three pieces. I was able to glue and staple it back together, but it happened again. Third time is the charm right? I finally got it. Let’s never do that again.


I thought about taking pictures of the frame laying on the floor in pieces, but I wasn’t in the mood to document this failure. Let’s just say I got it done. Let’s move on.
DOOR TAKE TWO
The door turned out to be a pain for a few reasons. First, I didn’t install it correctly causing the frame to break twice. Secondly, I didn’t scuff up the frame before painting. This made the paint less likely to stick properly — especially when I closed the door and it made contact with the frame, when I opened the door, the paint stuck to the door and caused a rip on the door jamb. Finally, for some reason painted the top and bottom of the door. This was a mistake because it now rubs on the top of the door jamb. Good thing I own a belt sander. And to think I was contemplating putting in a pocket door!


CARPET
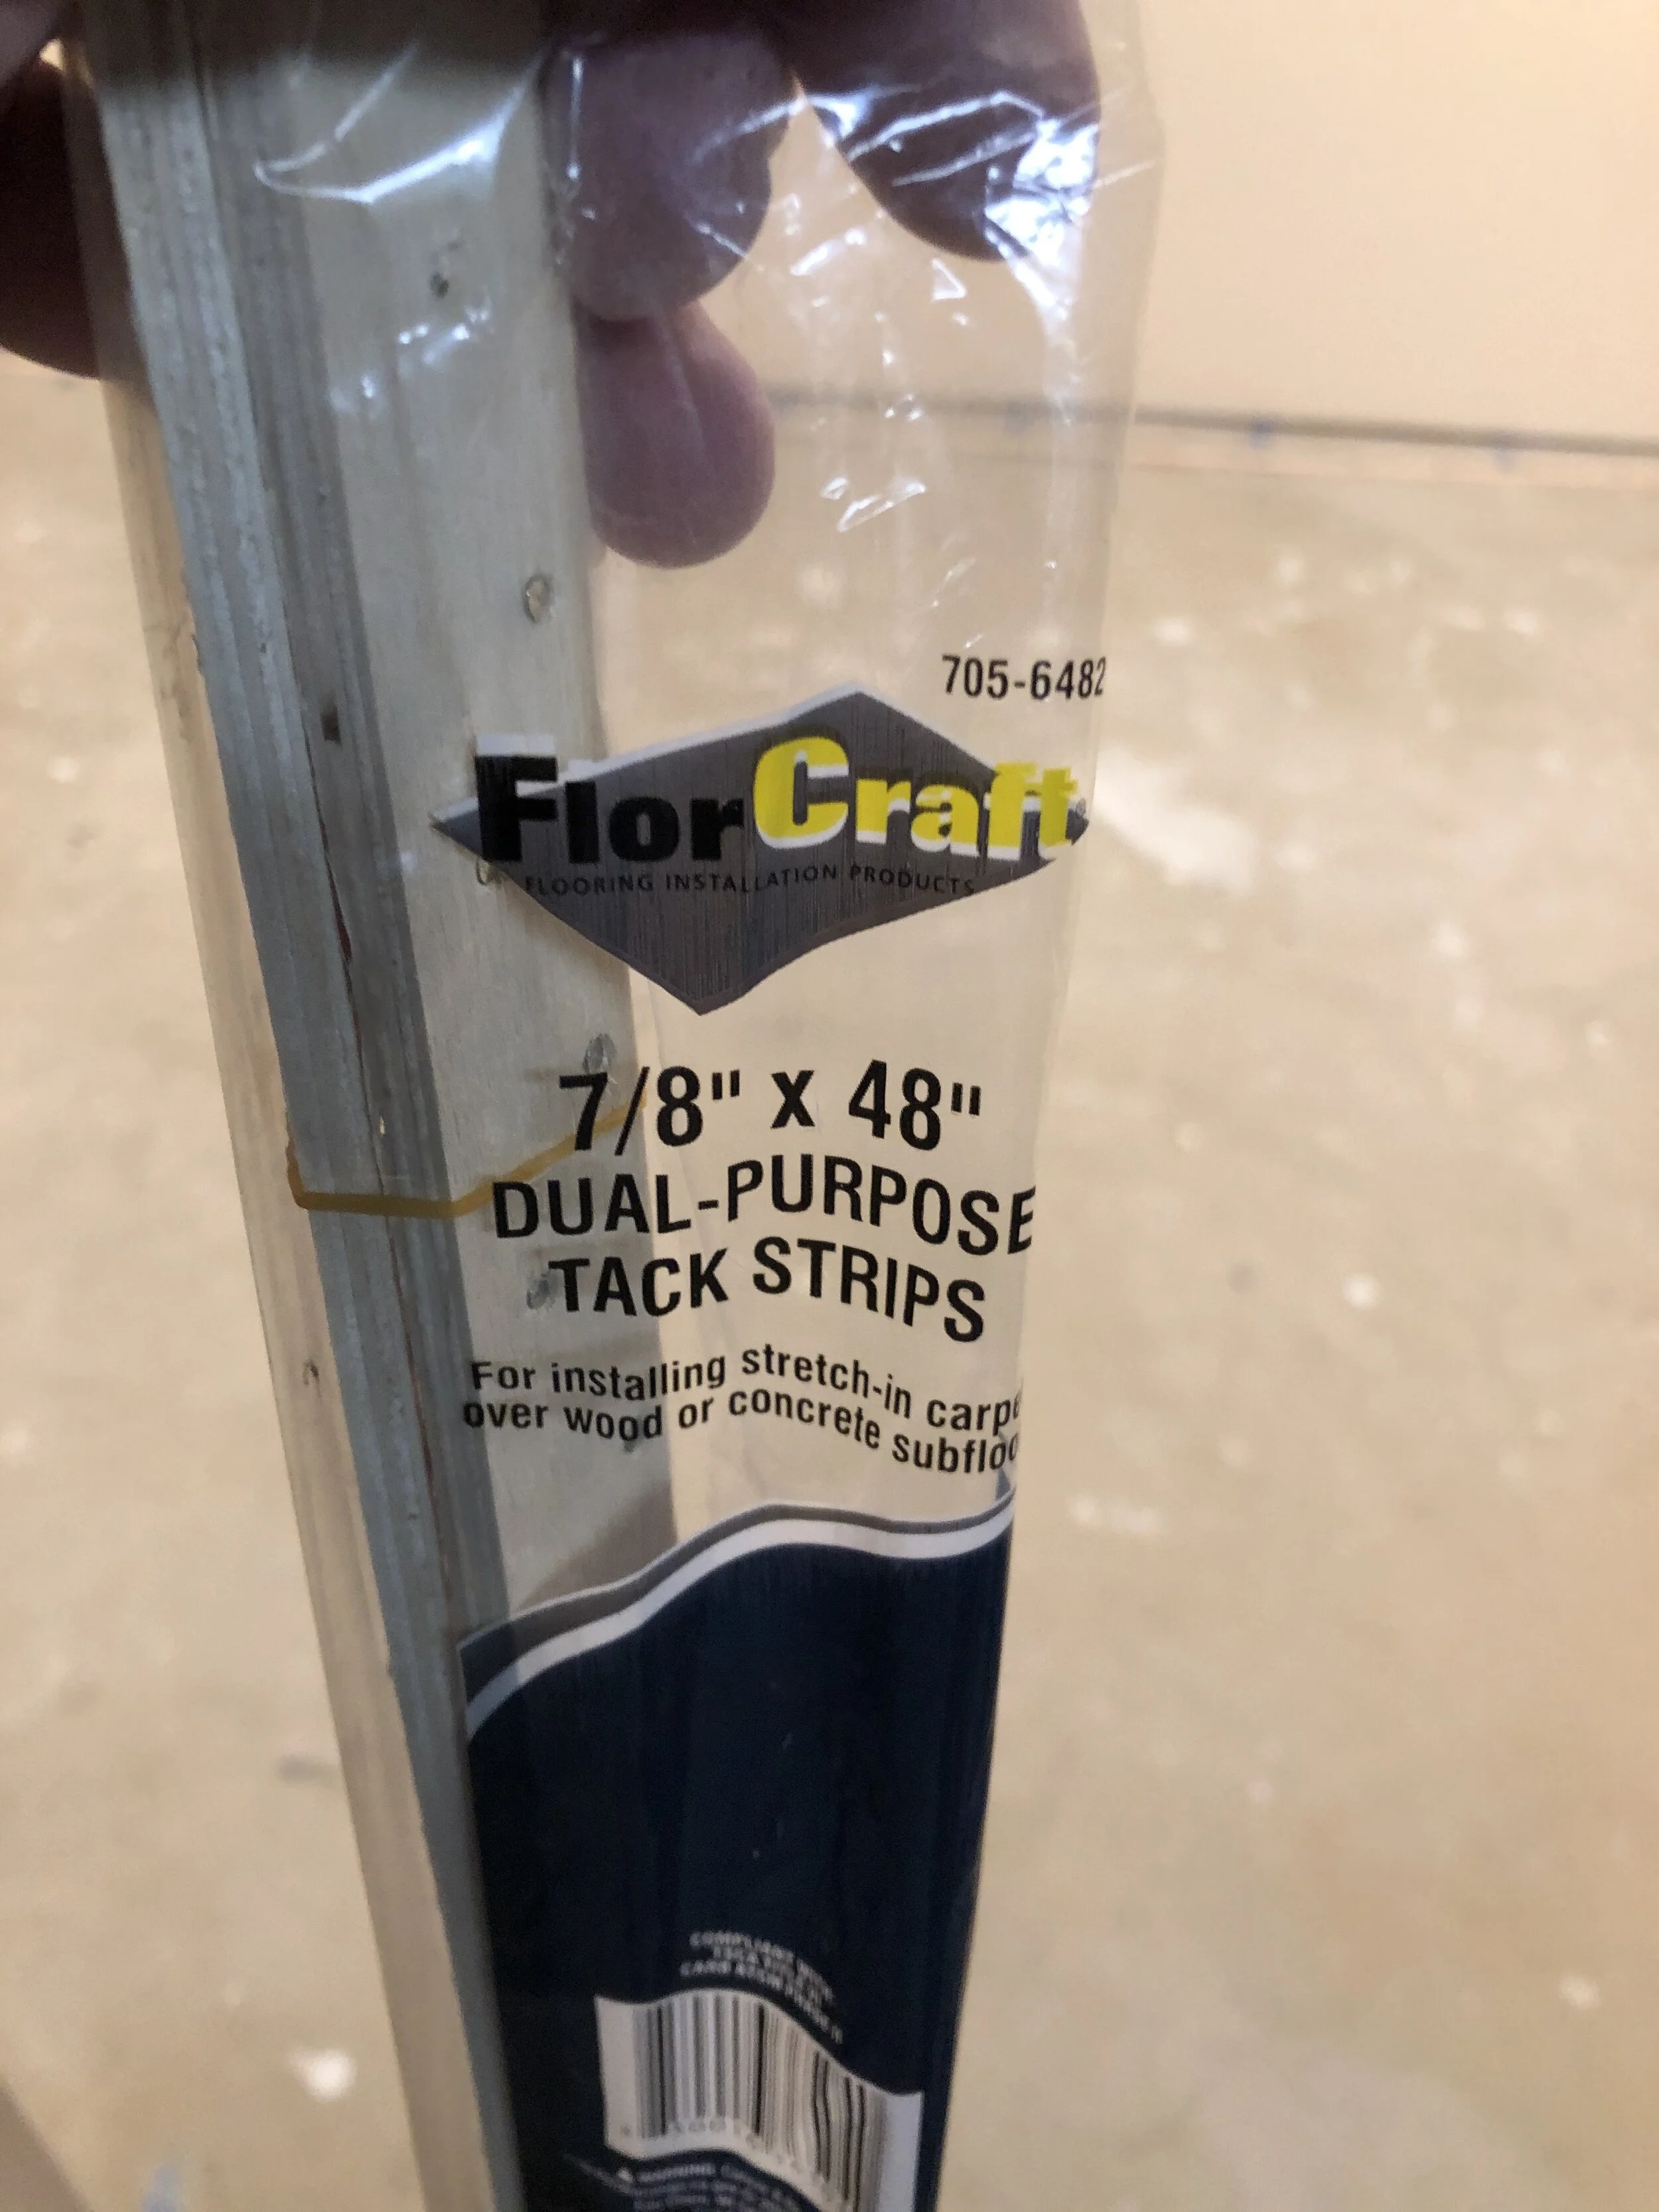
The carpet will be the next big task. I still need to paint all of the trim (baseboard and door trim) to be installed after the carpet is in. I decided to change the installation slightly — that is to say, I’m making it more complicated. I’m going to tack it down like wall-to-wall carpeting, and I’ll be putting in padding. Originally I thought “let’s just lay it down, cut it to size and call it a day.” Then I started to think of all the things that “might” go wrong. Ugh, let’s not. If I put it in correctly, it should be fine. I guess we’ll see.


I will say that I have a new respect for carpet installers. And who invented that knee kicker thing? That thing is painful. The good news is that I was able to rent one from Menards for $8.00 for 4 hours. Yet another career that I’m glad I didn’t get in to! If you need a carpet installed, call a pro.
BASEBOARD TRIM
Here’s another first for me. While I’ve patched in a piece or two, I’ve never installed trim for an entire room. Initially I was going to use a coping saw to miter the corners, but the saws that I have were so rusty that they could barely be used. Back to the power miter saw.


Installing trim was one of those first time tasks. It took a few hours — mostly because I didn’t want to make a mistake and have to go buy more trim, paint, etc. I think it turned out pretty well. I usually like to put a baseboard shoe on as a finishing touch, but decided to cut my losses and keep it simple. I’m grateful that I have a compressor and nail gun. Can’t imagine hand nailing this stuff.
HOME STRETCH
Now that the carpet and trim are in, and the equipment window is finished, it’s time to perform the lasts tasks. Installing the screen, mounting the speakers, mounting the projector, bringing in the media room chairs and installing and wiring up the electronics. Just a few things to do.


The screen was a bit of a pain. Many thanks to my son, Matt for sacrificing his Saturday afternoon to help. At one point I wasn’t sure the front side speakers were going to fit along the sides of the screen. When I did a dry run with speaker mounts, I didn’t account for the fact that I would lose nearly an inch of wall space after the sheet rock was installed. As it turned out, there was just enough room.
Mounting the corner speakers were a bit of a challenge. I wanted to have them angle out towards the middle of the room. To do this I would need a very long screw and potentially a small shelf due to the weight of the front speakers. I decided to go a different route. I used strap steel to hang the speakers using “S” hooks. It was clunky trying to get things to line up, but in the end it worked out great. The center speaker located under the screen will need to be raised, but for now it’s going to rest on the floor. Unfortunately, the outlet was in the center of the room (more or less) and was one of those things I didn’t consider during the build phase or I would have moved it. My son did suggest installing one to the left where the sub will go — but I didn’t listen. Fortunately, I can tuck the power cord under the trim to help make things look more polished.
The equipment window had me worried for some time. I wasn’t sure how to frame it, and ran in to some trouble with the shelves — specifically how to finish the facing edges. In the end however it turned out pretty well. The monitor at the top of the window had to be mounted slightly lower than originally planned. Again, when I was in the planning stages and didn’t have to deal with a ceiling so I could put it where I wanted it. Funny how hindsight works.
COMPLETED


In the above “final” views, I’m happy with the results. The room was originally designed for two, however I’m sure the grand-kids will want to watch a movie or two at some time. They each have a “Big Joe” bean bag chair that they can drag down and use. So far I’ve only watched parts of some movies to align the projector and do speaker tests. Almost ready for a full-length flick.
BEFORE AND AFTER SHOTS
This section was fun to put together. It shows such humble beginnings and ends with an idea brought to conclusion. I hope you enjoy them.


ADDING STUFF
I have a modest DVD and Blu-Ray collection that I thought would be more appropriate in this room. I decided to locate them on the back wall so there wouldn’t be any distractions during a showing. Fortunately everything fit. In the middle shelf you’ll see a sign that my mom gave me many years ago. It now has a new home. On either side of the sign you’ll see two CD-ROM clocks. I made these for two of my favorite sci-fi movies: Metropolis and The Day the Earth Stood Still. Both clocks are made from actual movie DVD’s.
If you’ve seen the entire website on this room, you may recall that I was going to mount a universal IR controller on the ceiling to control the equipment. To make the controlling easier, I’m using an old iPad mini as a screen. To make it convenient to use the iPad, my son purchased a cup holder stand. This way you don’t have to try and old the iPad while making selections.
Finally, when the grandkids come down to watch a movie, they can sit in their own chairs. They bought their own bean bag chairs a while ago to use when watching TV upstairs. We have yet to test them in this room, but I think things will work out.


WHAT’S NEXT?
While I’m happy with the sound, I have a large wall (the west wall) that looks a bit bare. My thought was to install some acoustic panels to absorb any sound reflections. There are some very creative folks that have created movie poster acoustic panels that look very nice. Cost isn’t as expensive as you might think, but selecting the proper poster art that will be on the wall for years is the hard part. Instead of movie posters, I thought of using geometric shapes in a pattern instead. Decisions, decisions. I think instead I’m going to just enjoy the fruits of my labors and watch some movies. If I do move forward with acoustic panels, I’ll certainly post it here.
WALL ART
After much debate, I decided to go with geometric shapes. I have to say, there are many choices in this arena. Here are some pictures from websites that gave me some inspiration. Click on any photos to enlarge.


Some of these were close, but not exactly what I had in mind. The wood wall art (far right picture above) was very dramatic, but costly and heavy. Interestingly enough, it was made from 1” x 2” end pieces and painted black. Thought about attempting something like that myself, but wanted quicker results. Maybe some day. In the end, I decided on hexagon shapes in two sizes. I used the colors of the trim for the large pieces and a dark brown for the smaller ones to give it some contrast. These are actually canvas shapes stretched over a wooden frame similar to what you would use to paint on. in fact, the smaller hexagon shapes came in a three pack as a ready to paint kit. I thought it came out pretty well, but isn’t as large as I had envisioned.


I purchased these shapes at Target. After painting them, I pounded small nails in the corners on the underside. I then cut off the nail heads to make them pointy. I could then push the shapes into place on the wall. I used an old VHS cassette tape for spacing. I didn’t get any noticeable sound absorption as the collection was fairly small against such a large wall. In retrospect, I should probably have made the collection larger or used additional large hexagons in different colors. I’ll make a note of it for the next media room. In case you’re wondering, there is no significance to the shapes, their color or arrangement — or maybe it’s because I was stung by a bee once.
DEDICATION PLAQUE
This is something that I’ve been working on in my mind almost since the beginning. How to properly dedicate this room? I wanted something simple, yet elegant. A plaque for sure, but would just a brass plate be enough? In the end, I ordered an engraved brass plate from an internet company called Custom Signs, but it was lacking something. It seemed too plain by itself. Maybe some sort of base? Back to the internet. I eventually found a website that sold plain wooden plaques in various shapes and finishes. I went with a 6” x 8” walnut finish design that I think turned out fantastic. This came from Trophy Kits. Here are some pics of the assembly process.


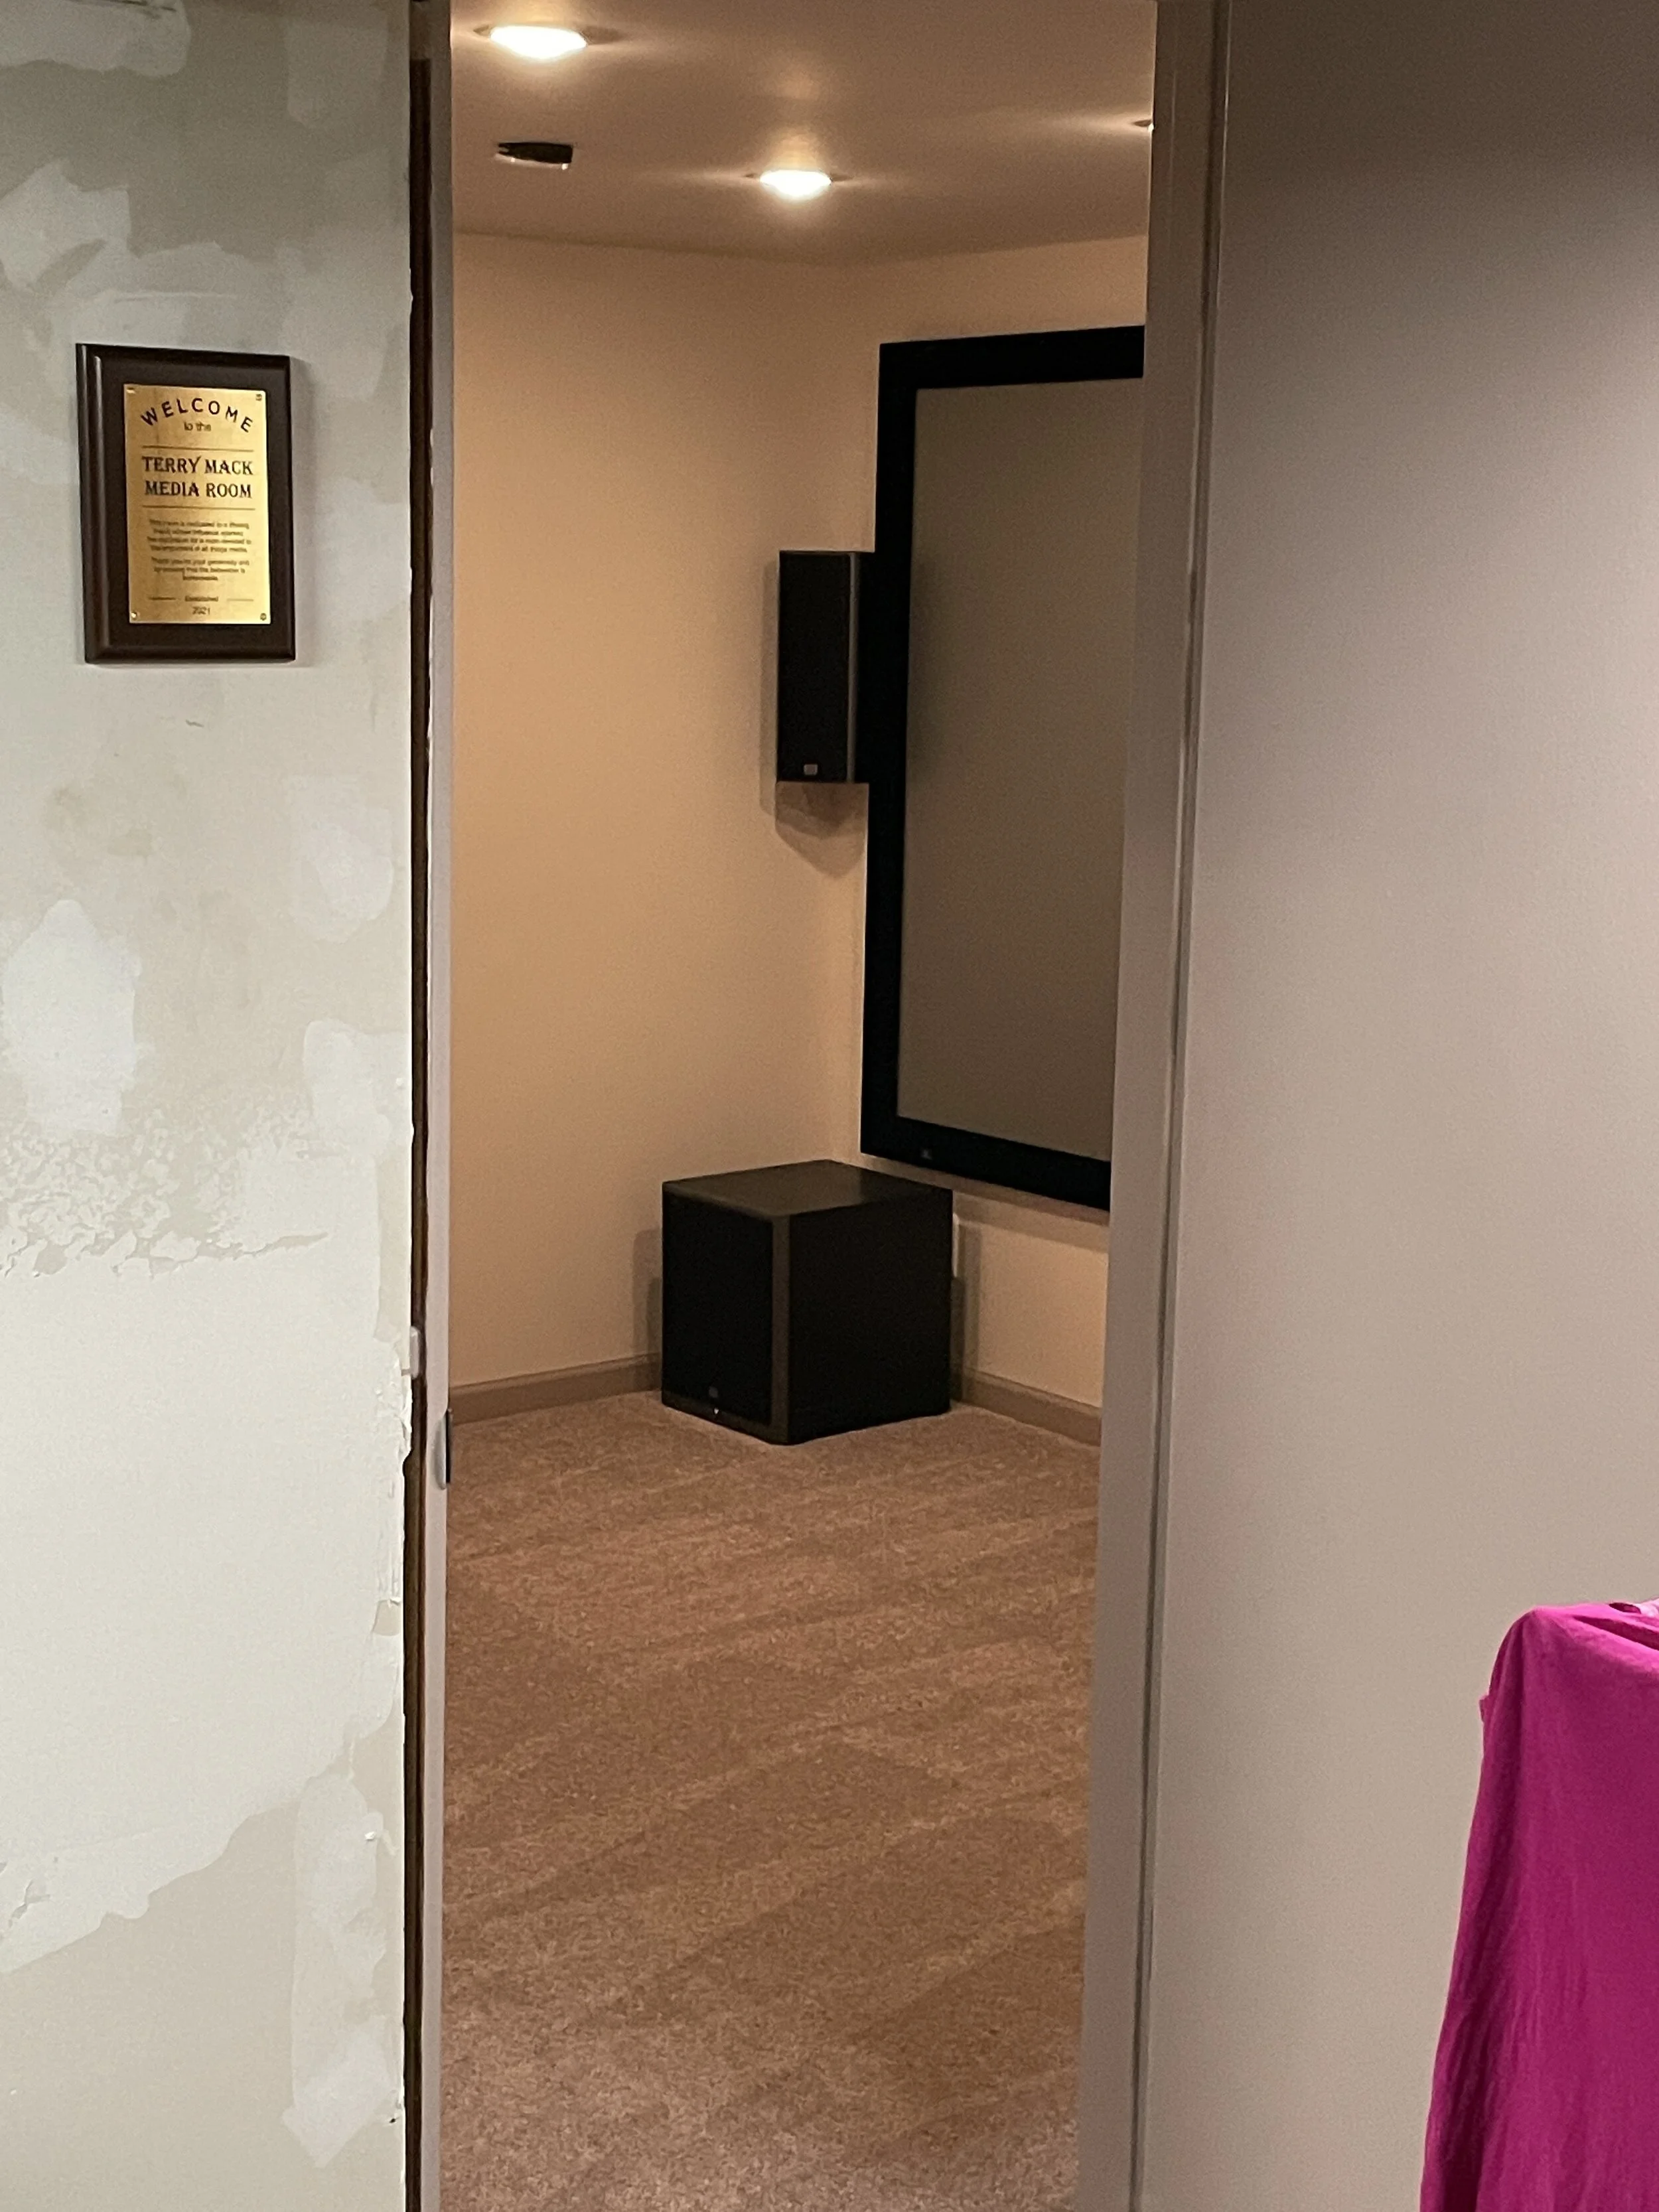

I only had one chance to get this right. In the end, I’m really pleased with the result. It’s hanging outside the media room currently, however I still have some work to do finishing the outside wall and need to add door trim. Something to do in my spare time!
I’ve enjoyed many movies since the completion of this room. We even have a “family movie night” every so often. The kids think it’s cool to sit in their bean bag chairs to watch videos and movies. I’ve only had a few non-family members over to enjoy this room, one of them was Terry himself. Glad he was able to make it. I hope he can come out again soon. In the meantime, I’ll make sure it’s well used and loved.
UPDATE 11/24/2021

BACK LIT LED SHELVES
I recently decided to act on something that I’ve thought about for some time … back lighting the book shelves that sit behind the viewing chairs. I’ve had this idea for what seems an eternity and while shopping for something entirely different, I saw the box on the left and somehow it spoke to me. It seemed to have all of the right features, so I took a chance and bought it. About a day and a half later I had the lights installed.
I got quite an education on working with LED lights. I have a few other projects that I want to pursue including lighting the pantry with LED strips. But that’s another story. Below is how I added LED strip lights to the media room.
Like most other aspects of putting the media room together, viewing lots of YouTube videos was among the many activities I did to prepare for this mini project. That and pouring over the specs of countless brands of LED strip lights. I’m sure most people reading this know what LED strip lights are, so I won’t go in to a boring history or forensic description, however I do need to point out some of the characteristics of the particular strip I selected.
SengLED isn’t the best or the worst brand of LED strip lights, it’s a middle ground brand. This specific model was a five conductor (five wire) strip with both dedicated white and color LEDs. The strip was 16.4 feet (5 meters) long. The kit came with a power supply and in-line Bluetooth transmitter with an on/off switch. The cost was $24.99 at Best Buy. Below are some pics of the LED strip before I started the process.


As far as I know, all LED strips can be cut to help provide a better fit. The problem I ran in to was two fold; first the strip was 196.8 inches long and I needed to divide that in to three equal lengths. If you do the math, 196.8 divided by three equals: 2.79. Not exactly perfect. The second problem was that the designated cut areas didn’t line up with how I wanted to install the strips.
I did some quick estimating and decided that I would put a full strip on the top and bottom shelf, and put what’s left in the middle. My hope was that the top and bottom would fill in what might be lacking in the middle. When you see the final picture(s), I think you’ll agree that my gamble paid off.
So the next part was the tricky part — cutting the one long strip in to three smaller strips and soldering the sections back together so they all work as one assembly. You might ask “why not just loop the strip around the shelves like a serpentine belt?” Because the strip wouldn’t accommodate the bend I would need and it would create a “hot” spot on the ends where the strip looped around. A “hot” spot is a bright area where there is more light in one area versus the rest of the strip. Since I wanted the illumination to look uniform I was stuck cutting and soldering. Below are some pictures showing the cutting and soldering process.


I was nervous making the first cut. Not only because it might make that portion of the strip unusable, but because I also had to trim off a protective coating that covered the top of the strip. At first I thought this was moisture protection, but the box states “indoor use only.” Either way, it was another delicate maneuver with an Exacto knife. I won’t lie, I did scratch the copper contacts on a couple ends — see close up pic above. Fortunately all of the segments worked.
The wire I used was from a box of 4-conductor alarm wire that I had in the attic. Ask Karen, I never throw anything away. This time it paid off. Fortunately, the wire also had a ground wire running through it which I could use as the fifth wire. Ironically, the colors of the wire matched the contacts of the strip — see the picture of soldering the wires above. As for the ground wire, I covered it with a small piece of heat shrink tubing to keep it separate from the other wires. I also used heat shrink tubing to finish the job by covering the wires to minimize them from moving too much when handling the finished ends. After all the soldering was finished, I tested the strip — and it worked!
The next step was to install the strips on the shelving. Most LED strips, including this one have a self-adhesive backing. This makes putting the strips in place much easier. Below are a couple of pictures showing how the LED strips were “stuck” to the shelves.


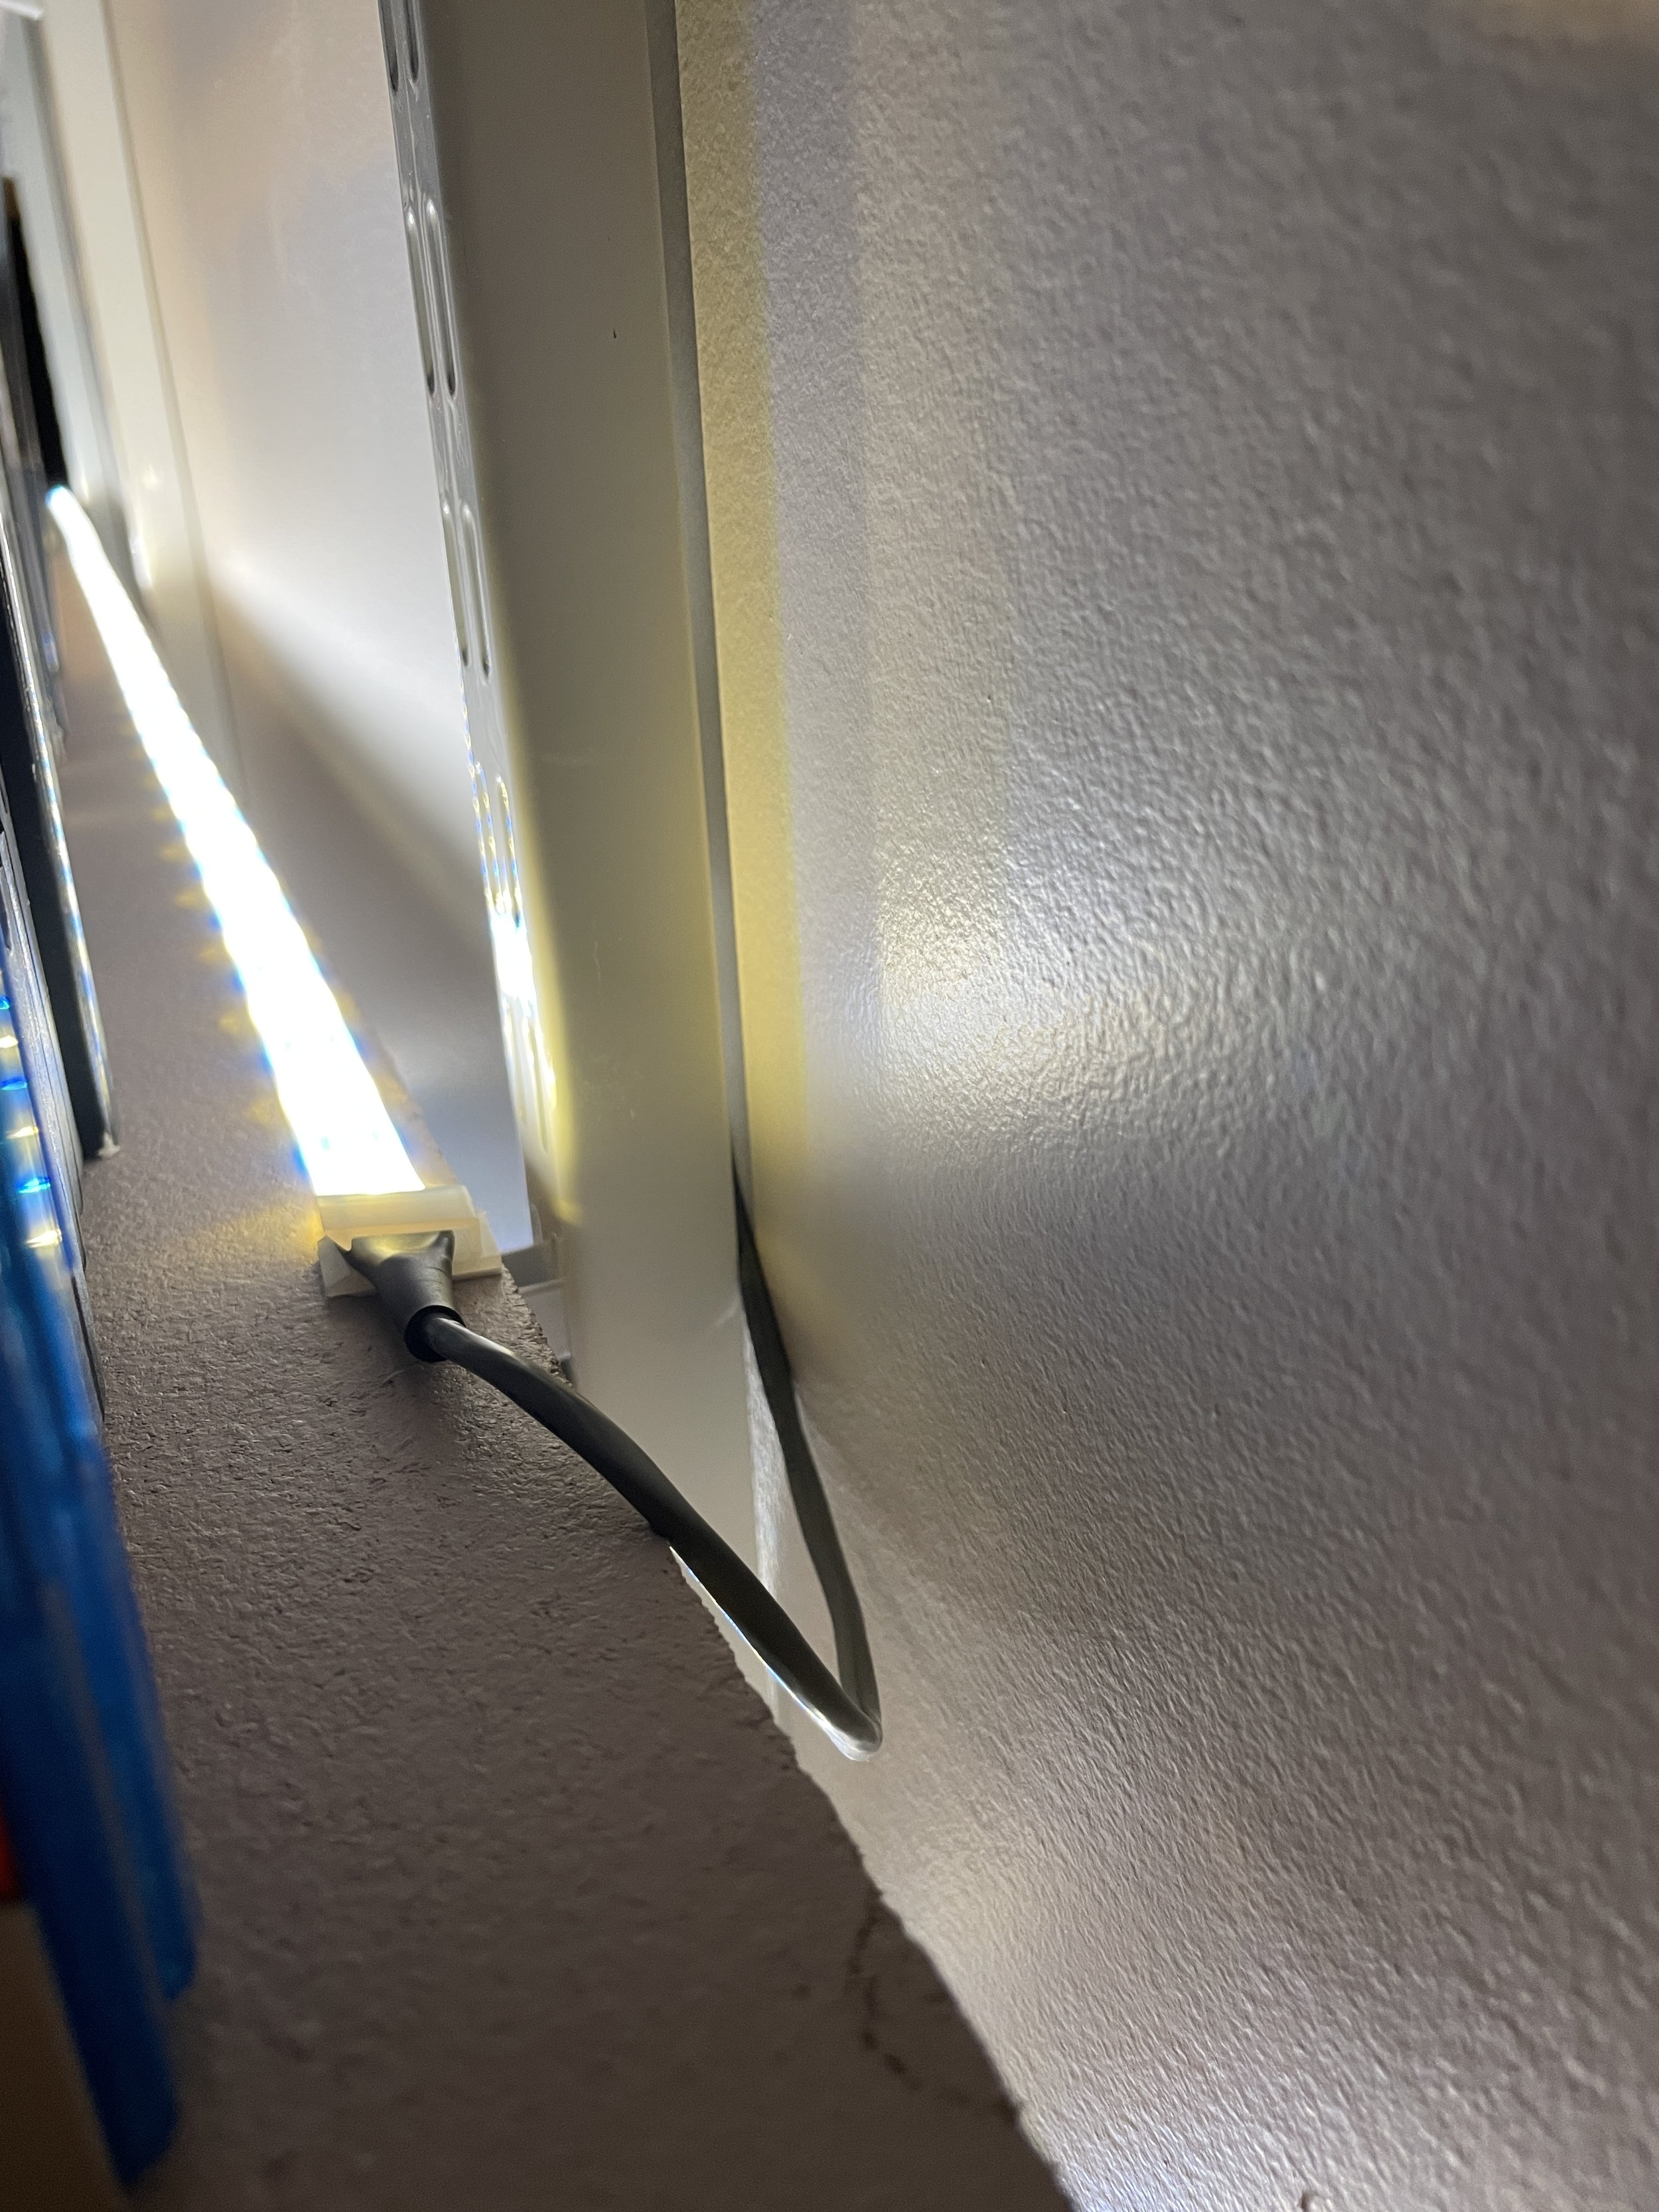

I hid the connecting wire by tucking it behind the vertical struts that hold the shelves up. In the three pics above on the right, you can see where I used adhesive clips to hold the ends in place. From the front, you really don’t see the wires unless you know what you’re looking for.
The Final Result


So many colors, so little time. Some colors didn’t register very well. Yellow for example looked more white, probably because it’s bouncing off a tan wall? Not to worry, the package boasts 16 million colors possible. I’m still experimenting with colors and brightness settings.
Because the strip is “Alexa” compatible, I can say “Alexa, turn on bookshelf lights” or tell her to make the light a specific color. I can also incorporate the strip in to a routine where multiple things can happen including turning the strip on, setting the brightness and specifying a color. Gotta love home automation.
Over all I’m pleased with the results. It didn’t cost a fortune, and as usual I learned some things. Next stop, the pantry! Thanks for reading.