
SMART HOME STUFF
Over the course of a few years I’ve implemented a fair amount of smart home devices. It started innocently with some Philips Hue smart bulbs and grew to 22. I have my son Matt to thank for leading the charge on this journey. While he still leads the way, I’m not too far behind. Between the two of us, we have a little bit of everything. While this hobby isn’t for everyone, ask my wife, it’s fun to see what can be done with some (usually) simple changes.
I’ve illustrated some of the projects that I’ve done below. Please note, this is for entertainment purposes only. If you attempt to duplicate any of the accomplishments I’ve documented, you do so at your own risk. Consider this my disclaimer. I hope you enjoy what I’ve done. If you have any suggestions, I’ve created a comment form you can fill out to send me your thoughts, good or bad.
SMART SWITCH
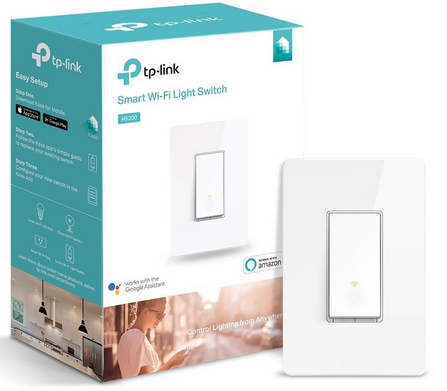
FOR MORE INFORMATION ON THIS SWITCH, CLICK ON THE IMAGE
I’m starting with one of the last things that I installed, mostly because it’s fresh in my mind. The smart switch was an inexpensive way to make the hanging light in our entrance hallway or foyer smarter. In almost all cases, I try to use devices that are “Alexa” friendly. I find it invaluable to be able to use my voice to make things happen. Anyone who’s stumbled in a darkened room trying to find a light switch might agree.
Normally, I’d use Philips Hue lights to make the bulbs smart, however with our foyer light it would have been too expensive to go that route. The bulbs in the foyer hanging light fixture use little candelabra bulbs. While these exist in the Philips Hue world, they are expensive. Running $16.50 each (sold in packs of two) for the white version. I need six total. The cost would be $98.97 plus tax. A smart switch on the other hand would cost only $12.99 plus tax. Full disclosure, it was on sale and my son bought it for me. Thanks Matt.
Let the fun begin.
I’ve replaced light switches in the past and this being a single switch that controls one light fixture should be a breeze. Well, that wasn’t the case. This particular light switch was one of two that sat side-by-side, one controlling the hanging light fixture, the other controlling the driveway lights outside. Still, how hard could it be? Here are some pictures of what I found when I removed the face plate.
So this looks like fun. Now I’m not an electrician, but I do know basic wiring. It took me a little while and an OHM meter to figure out what was going on here. Note, when I first opened the box there were only wire nuts connecting the wires. If you’ve seen my media room build documentation, you know I’m not a fan. I replaced the wire nuts with Wago wall nuts. They are IMHO superior to twist on wire nuts. While they cost more than traditional twist on wire nuts, they are easier to use, make connecting up to six wires a breeze and take less space than a wire nut.
Here it’s starting to look a little better. The confusing part (for me at least) is that the new smart switch had two load wires. It made more sense when I drew out a diagram. See below.


The diagrams above show how I interpreted the wiring. Note, since the neutral wire is white it would have been invisible against the white background, so I made it a blue dashed line. The diagram on the left represents how the wiring was when I started, and on the right after I was done. And yes, I did use a wire nut. I needed to connect one of the feed lines from the WiFi switch to the main feed and didn’t want to waste a Wago on that. There was a wire nut capping off the ground wire as well. Two demerits!
Here is the final result. The new TP-Link Kasa Smart WiFi Light Switch is on the left, and a Hue smart switch is on the right. The hue switch controls the two driveway lights.
The Kasa Smart Light Switch works like a champ. After connecting it to my Wifi network, Alexa was able to “discover” it and it’s now voice controlled. You can of course use the switch manually, but what fun is that? In case you’re wondering, the Kasa Smart Light Switch does not dim the lights. They do make a Smart Light Switch that does dim, and they make a three-way switch as well. Lots of choices for many needs.
Overall, I’m happy with my decision. I would have saved $85.00 and some change if I purchased the switch. Thanks to Matt, I saved 100%. And while it took longer than screwing light bulbs in, it was worth it.
UPDATE 08/16/2022
I like the way the current TP-Link switch is working for the foyer light. It occurred to me that it would be easy to do the same thing for the driveway lights. By doing this, I would free up two Hue lights and a Hue dimmer switch. I would simply replace the Hue lights outside with standard LED lights. Got this at Best Buy for $19.99.
And there it is. The image on the right shows the final view with both switches mounted and almost ready to go. You might notice a small orange dot on the right switch — that’s because it still needs to be added to the WiFi network.
The wiring for the second switch was much easier than the first one — mostly because there were less wires to deal with. The picture on the left shows both TP-Link switches connected. All that needs to be done now is mount the switches in the box.